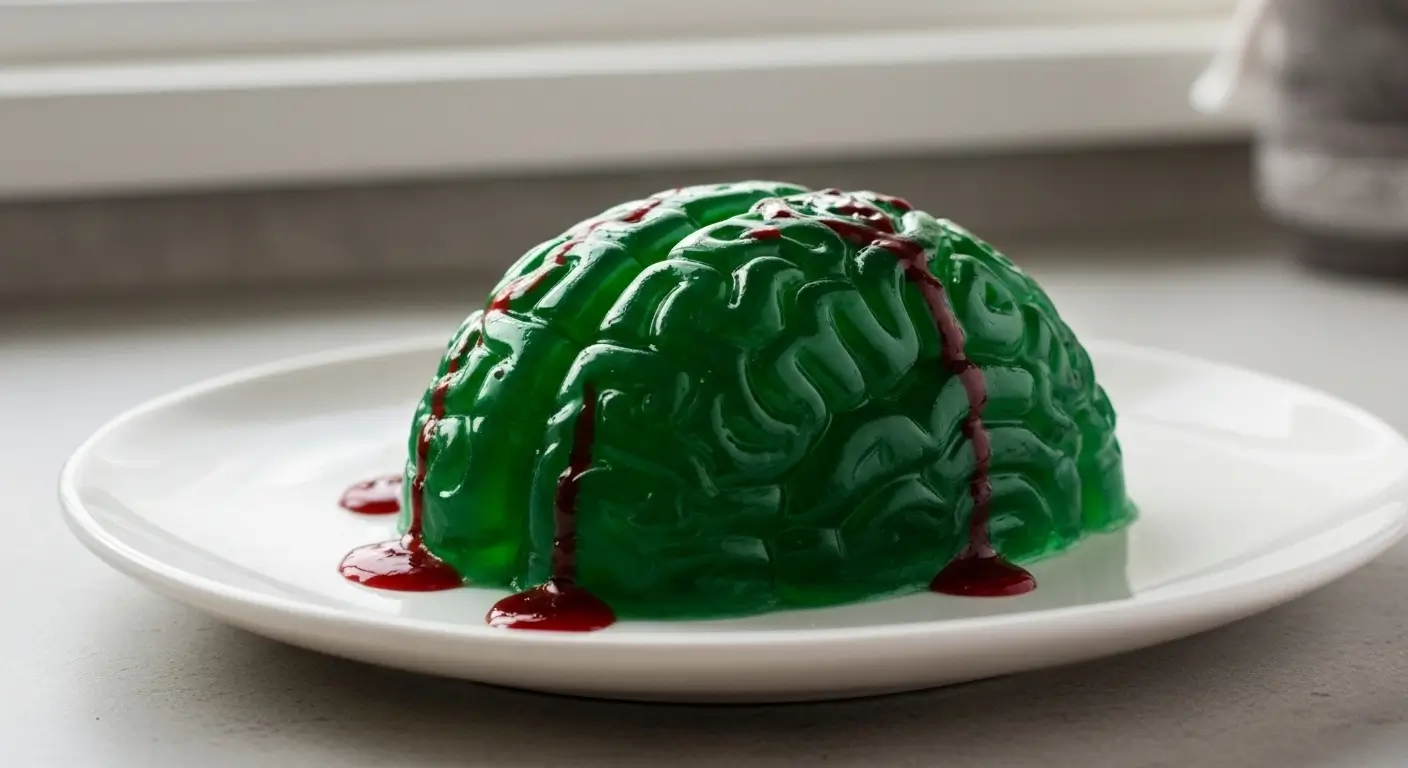
Zombie Brain Jello: The Grossest (and Easiest) Halloween Dessert I’ve Ever Made
Okay, so I’m gonna be honest with you. The first time I tried making Zombie Brain Jello, it was a complete disaster. Like, I’m talking about a green blob that looked more like Shrek’s… well, never mind. Let’s just say it wasn’t pretty. But after three attempts (yes, THREE), I finally figured out how to make this creepy Halloween Brain Jello Recipe actually look realistic and taste good.
Now here’s the thing… everyone at my sister’s Halloween party last year wouldn’t stop asking about this thing. My nephew literally poked it for like five minutes straight before he’d even try it. Worth it.
Table of Contents
Why This Halloween Brain Dessert Is Actually Genius
Look, I’m not someone who spends hours on fancy desserts. I have a full-time job and a dog who thinks 6 AM is sleeping in. But this Zombie Brain Jello? It looks like you slaved away in the kitchen for hours when really it takes about 10 minutes of actual work. The rest is just waiting for it to set in the fridge.
And the best part? Kids absolutely LOVE this. My friend’s 7-year-old kept calling it “the squishy brain thing” and asked for seconds. Adults think it’s hilarious. Win-win.
I first saw something like this on Pinterest (where else?) back in 2019, but the recipe was super complicated with like eight ingredients and multiple steps. I thought… there’s gotta be an easier way. Spoiler alert: there is.
What You’ll Need for Creepy Halloween Jello Brain
Alright, here’s what you need to grab from the store. And please, for the love of everything spooky, don’t wait until October 30th to buy a brain mold. Trust me on this one. (Learned that the hard way in 2023 when I had to drive to THREE different stores.)
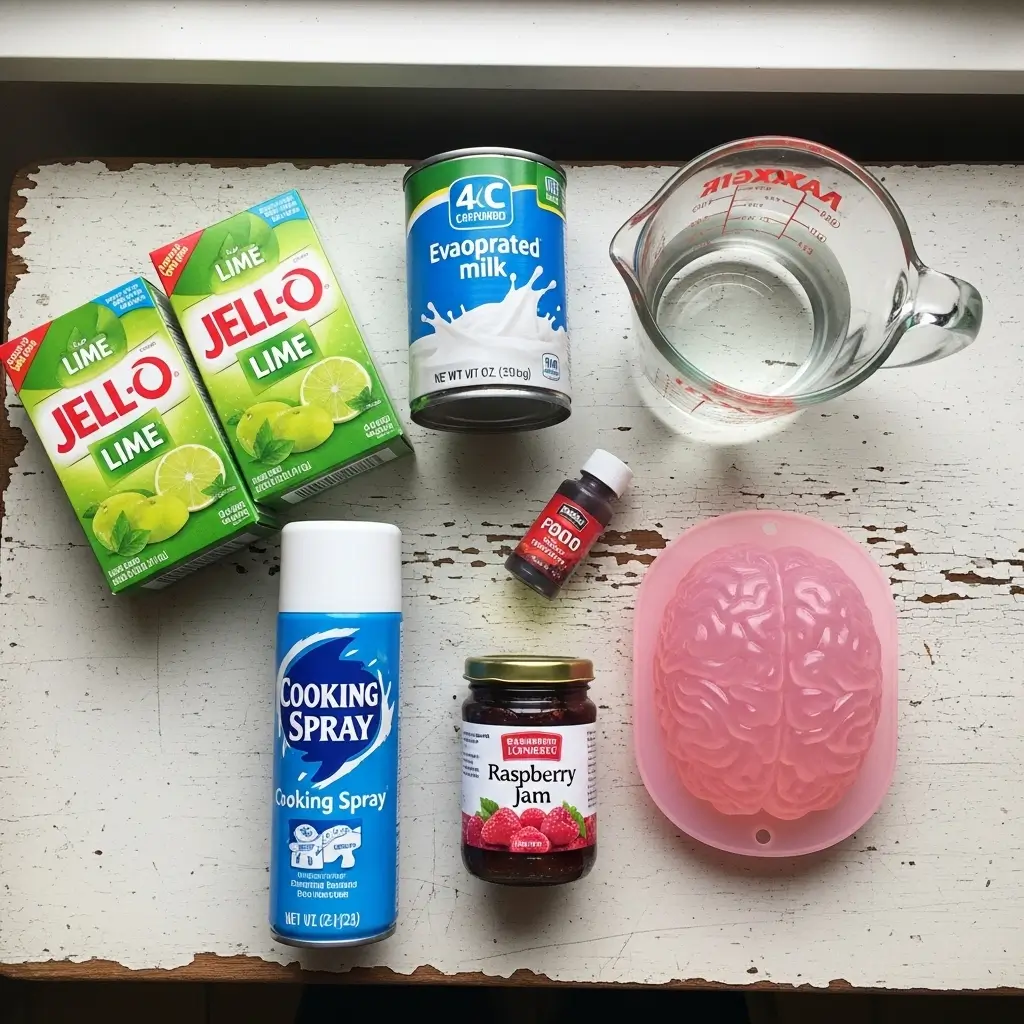
For the Jello Brain Mold Recipe:
- 2 boxes (3 oz each) lime-flavored Jello – I use lime because it gives that gross greenish color, but you can use strawberry or peach for different effects
- 2 cups boiling water – like, actually boiling, not just hot from the tap
- 1 cup cold water
- 1 can (12 oz) evaporated milk – NOT condensed milk. Made that mistake once. Ew.
- Non-stick cooking spray – essential unless you want your brain stuck in the mold forever
- Brain-shaped silicone mold – Amazon has tons of these, usually around $12-15
Optional (but highly recommended):
- Red food coloring – for extra creepiness
- 2-3 tablespoons raspberry or strawberry jam – for making “blood”
- Gummy worms – because why not?
Shopping tip: The evaporated milk is usually on the baking aisle, not with regular milk. Took me forever to find it the first time.
Making Your Spooky Jello Brain Recipe (The Easy Way)
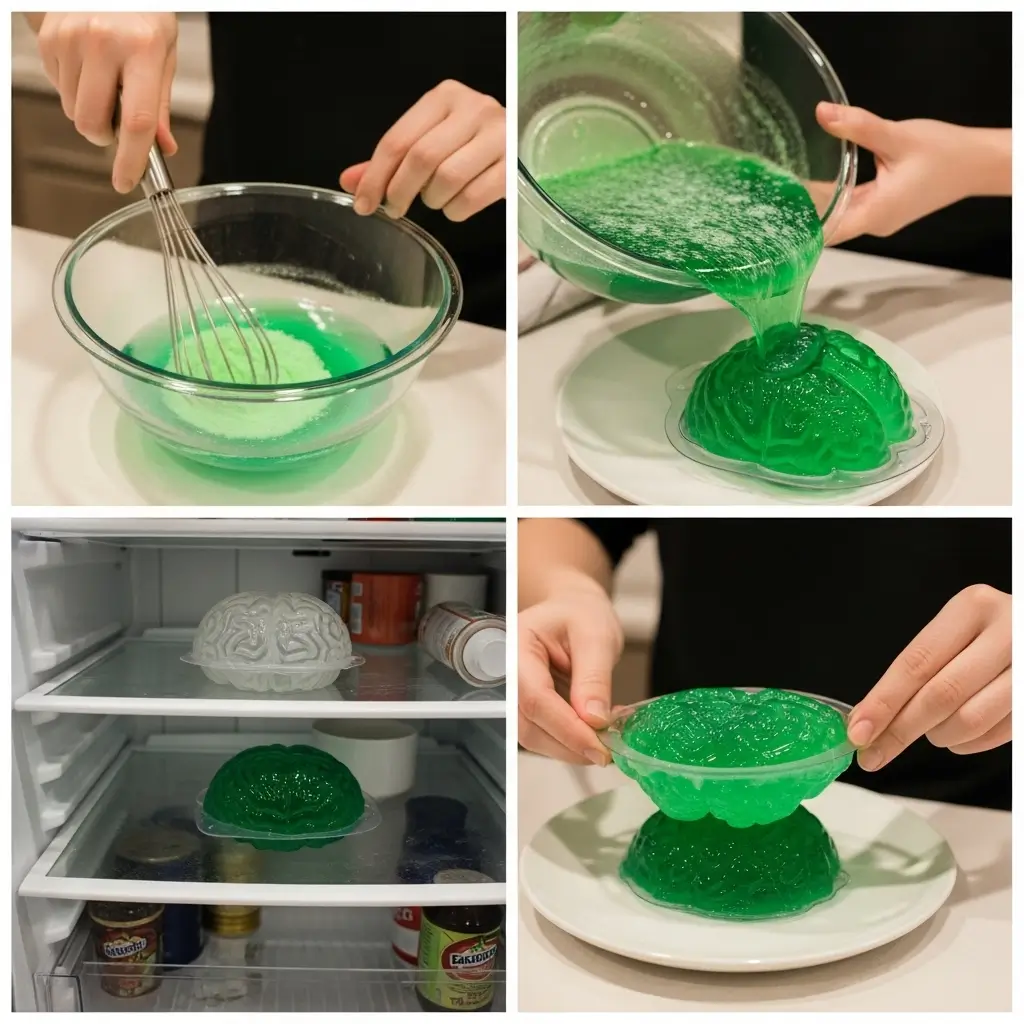
Step 1: Prep Your Mold
First things first – spray that brain mold with cooking spray. Like, really coat it. I was stingy with the spray my first time and… yeah, half the brain stayed in the mold. Not cute.
Step 2: Make the Jello Mixture
Pour your Jello powder into a large mixing bowl. Add the 2 cups of boiling water and whisk until completely dissolved. This takes about 2 minutes of stirring. Your arm might get tired. Sorry.
Here’s where I almost messed up the first time – I added the cold water too fast and it splattered everywhere. My kitchen counter looked like a lime crime scene. So, you know, take your time with this part.
Add the 1 cup of cold water and stir. Then comes the evaporated milk. Pour it in slowly while stirring constantly. This is what gives your Easy Halloween Brain Jello that realistic, fleshy look. (I know, gross description, but that’s the point!)
Step 3: Color Time (Optional but Fun)
If you want to make it look even more realistic, add a few drops of red food coloring. I usually add about 5-6 drops and give it just a tiny swirl – don’t mix it completely! You want those vein-like streaks running through your Halloween Brain Dessert.
Last year I got fancy and added some blue food coloring too. Made it look kinda bruised. My sister thought it was too realistic and refused to cut into it. Mission accomplished.
Step 4: Pour and Wait
Pour the mixture into your prepared brain mold. Be careful because it’s gonna be pretty full and you don’t want it sloshing everywhere (been there, done that, had green Jello on my socks).
If you’re using gummy worms, now’s the time to stick them in there. I like to let them hang out the top a bit. Adds to the whole zombie aesthetic, you know?
Pop it in the fridge for at least 4-5 hours. I usually just make it the night before my party because I’m paranoid about it not setting properly.
Step 5: The Big Reveal
This is the scary part. And I mean scary for YOU, not your guests.
Run a butter knife gently around the edges of the mold. Place your serving plate upside down on top of the mold, then flip the whole thing over. Give it a little shake. The brain should slide right out onto the plate.
If it doesn’t come out immediately, don’t panic! (I totally panicked my first time.) Just let it sit for a minute. The warmth from your hands holding the plate will help. You can also run some warm water over the outside of the mold for like 10 seconds. Works like magic.
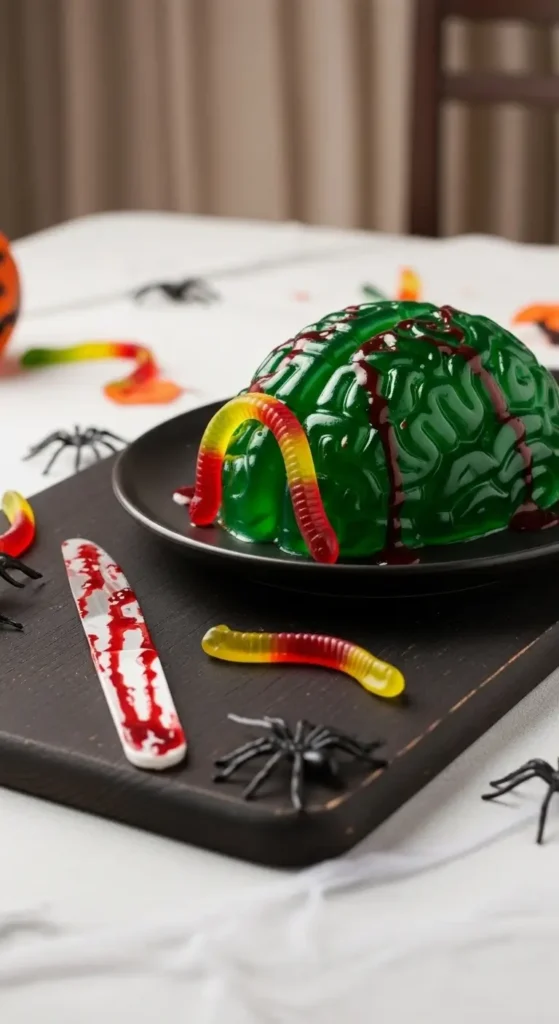
Making It Extra Gross (The “Blood” Effect)
Okay, this is where you can really freak people out with your Scary Halloween Jello Recipe.
Take 2-3 tablespoons of raspberry or strawberry jam and mix it with about 1 tablespoon of water. Microwave it for 20-30 seconds until it’s liquidy. Then drizzle this “blood” all over your brain. Let it drip down the sides. Maybe even put some on the serving plate around it.
Pro tip: Have a plastic knife sitting next to the brain with some of the “blood” on it. The dramatic effect is chef’s kiss.
Common Mistakes I Made (So You Don’t Have To)
Mistake #1: Using a plastic brain mold instead of silicone. The silicone ones are SO much easier to work with. The plastic ones… let’s just say my first attempt ended with me using a spoon to scoop brain chunks onto a plate. Not the vibe.
Mistake #2: Not letting it set long enough. I got impatient once and tried to unmold it after 3 hours. It was still jiggly in the middle and collapsed. Waited the full 5 hours ever since.
Mistake #3: Skipping the cooking spray. I thought I didn’t need it because I had a non-stick mold. I was wrong. So very wrong.
Mistake #4: Making it too far in advance. This Halloween Brain Recipe Easy version is best made 1-2 days before your party, max. After that it starts to get a little watery.
Serving This Halloween Brain Jello Ideas
I like to put mine on a dark plate or a fake cutting board. Makes it look more dramatic. Sometimes I surround it with those little plastic Halloween decorations from the dollar store – fake spiders, bones, whatever.
One time I served it on a bed of black paper “shreds” (just construction paper I cut up because I’m extra like that). People took SO many pictures.
And here’s something funny – adults are way more hesitant to try it than kids. Kids just dive right in. Adults stand there like “…is it gonna taste weird?” It’s literally just Jello, people!
Can You Make This Ahead? (And Other Questions I Get Asked)
Q: How far ahead can I make this Zombie Jello Dessert?
A: 1-2 days max. After that it starts weeping (releasing liquid) and gets kinda sad looking.
Q: Can I use regular milk instead of evaporated milk?
A: I mean, technically yes, but it won’t look as opaque and realistic. The evaporated milk is key to getting that flesh-like appearance. I know, gross description again, but accuracy matters here.
Q: What if I don’t have a brain mold?
A: You could use any mold honestly. I’ve seen people use bundt cake pans, regular bowls, whatever. It won’t look like a brain but it’ll still be a fun Halloween Brain Treat.
Q: Is this recipe kid-friendly?
A: Absolutely! Unless you add alcohol (which some people do – just replace the cold water with vodka). But the basic version is totally family-friendly.
Storage Tips
Keep your Realistic Halloween Brain Jello covered in the fridge. I usually drape some plastic wrap loosely over it. It’ll last 3-4 days, though honestly it never lasts that long at my house because people keep sneaking pieces.
Don’t freeze it. I tried that once thinking I could make it super early. Bad idea. It gets all crystallized and weird when it thaws.
Final Thoughts on This Halloween Zombie Brain Recipe
Look, I’m not gonna pretend this is some gourmet dessert. It’s basically fancy Jello. But it’s FUN, it’s easy, and it makes people laugh (and sometimes scream a little). That’s what Halloween is all about, right?
My favorite part is watching people’s faces when they first see it. Last year my coworker literally said “Oh my god, I can’t eat that” and then proceeded to have three servings. The drama!
So yeah, if you’re looking for a Halloween Party Brain Jello that’ll be a total conversation starter, this is it. Just remember – spray that mold, give it enough time to set, and have fun with the blood effect.
Now if you’ll excuse me, I need to figure out where I put my brain mold from last year. Pretty sure it’s in a box somewhere labeled “random kitchen stuff”… wish me luck!
Happy Halloween! And may your brain unmolding be smooth and dramatic-free. (Unlike mine were. Obviously.)