Okay, so I need to tell you about these witches fingers cookies because they’re basically the only Halloween thing I can make that actually looks scary on purpose instead of by accident. Like, usually my Halloween cookies just look scary because I messed them up, but these? These are SUPPOSED to look creepy.
Last year I tried making spider cupcakes and they looked more like blobs with too many legs. My son said they looked “sick” and not in the good way kids mean it. But these witch finger cookies? Even when I mess them up a little, they still look appropriately gross and everyone thinks I’m some kind of Halloween baking genius.
Table of Contents
Why I Love This Witch Finger Cookies Recipe
Look, I’m gonna be honest with you. I avoided making these for years because I thought they’d be complicated. The whole shaping-fingers-from-dough thing seemed like something only people with actual artistic talent could pull off. And I once failed an art class in college, so there’s that.
But then my daughter’s teacher asked parents to bring Halloween cookies for kids to the class party, and I panicked and Googled “easy Halloween cookies” at 10 PM the night before. Found a version of these, thought “how hard can finger shapes be?” and went for it.
Turns out? Not hard at all. They’re basically just Halloween shortbread cookies that you roll into finger shapes. That’s it. No fancy cookie cutters, no elaborate decorating skills, just… rolling dough. Which I’ve been doing since I was like five helping my grandma make cookies.
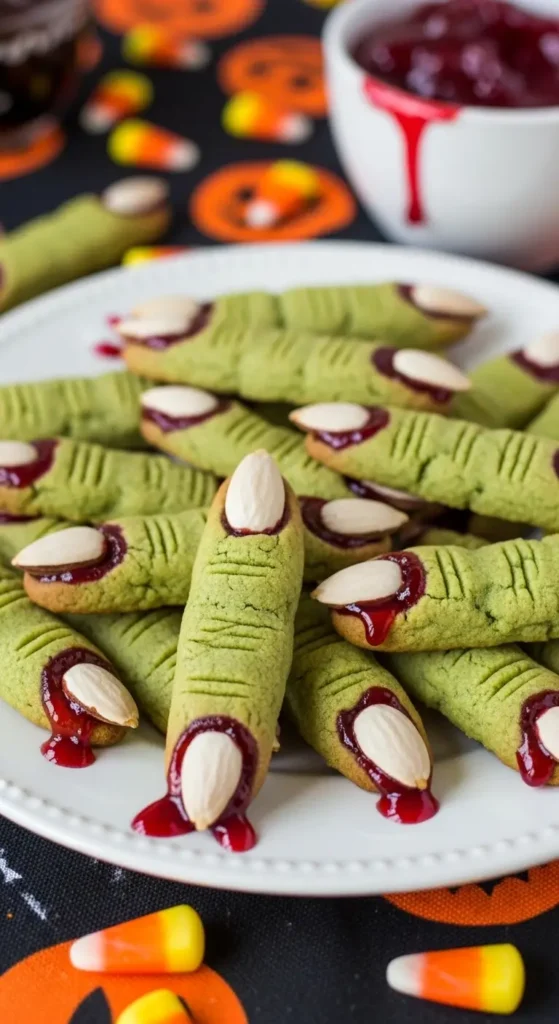
What You Need for These Creepy Halloween Cookies
Here’s what you need for these easy witch finger cookies:

The dough:
- 1 cup (2 sticks) butter, softened (leave it out for like 30 minutes, don’t try to microwave it, learned that the hard way)
- 1 cup powdered sugar
- 1 egg
- 1 teaspoon almond extract (this is KEY, don’t skip it)
- 1 teaspoon vanilla extract
- 2 2/3 cups all-purpose flour
- 3/4 teaspoon salt
- Green food coloring (optional but makes them look more witchy)
For decorating:
- About 40 whole blanched almonds (you can find these in the baking aisle)
- 1/2 cup strawberry or raspberry jam (for the “blood” – I use Smucker’s)
- Red decorating gel if you want to be extra
Shopping tip: Don’t buy sliced almonds. I did that the first time because they were cheaper and I thought “close enough.” They’re not. They fall off. Get the whole blanched ones.
And about the almond extract—some people skip it thinking vanilla is enough, but the almond flavor is what makes these taste like actual good cookies instead of just creepy props. Trust me on this one.
How to Make Witches Fingers Cookies (The Real Way)
Alright, let me walk you through this. Including the part where I messed up so you don’t have to.
Step 1: Make the Dough
In a big bowl (I use my stand mixer because I’m lazy), beat the butter and powdered sugar together until it’s fluffy. Like, actually fluffy. Should take about 2 minutes.
Add the egg, almond extract, and vanilla. Beat it until it’s all mixed and smooth. If you want green witch fingers, add a few drops of green food coloring here. I usually add about 4-5 drops for that nice witchy green color.
Mix in the flour and salt on low speed until a dough forms. It’ll be a little sticky at first but that’s normal.
Now here’s where patience is required—cover the bowl with plastic wrap and refrigerate for at least 30 minutes. I usually do an hour because I get distracted doing other things anyway.
DO NOT SKIP THE CHILLING. First time I made these, I thought “eh, dough is dough” and tried to shape them immediately. They spread everywhere in the oven and looked like… I don’t even know what. Alien fingers? Just refrigerate the dough.
Step 2: Shape the Fingers
Preheat your oven to 325°F (not 350°F like most cookies—these need lower heat or they brown too much).
Line a baking sheet with parchment paper. This is important because these cookies can stick.
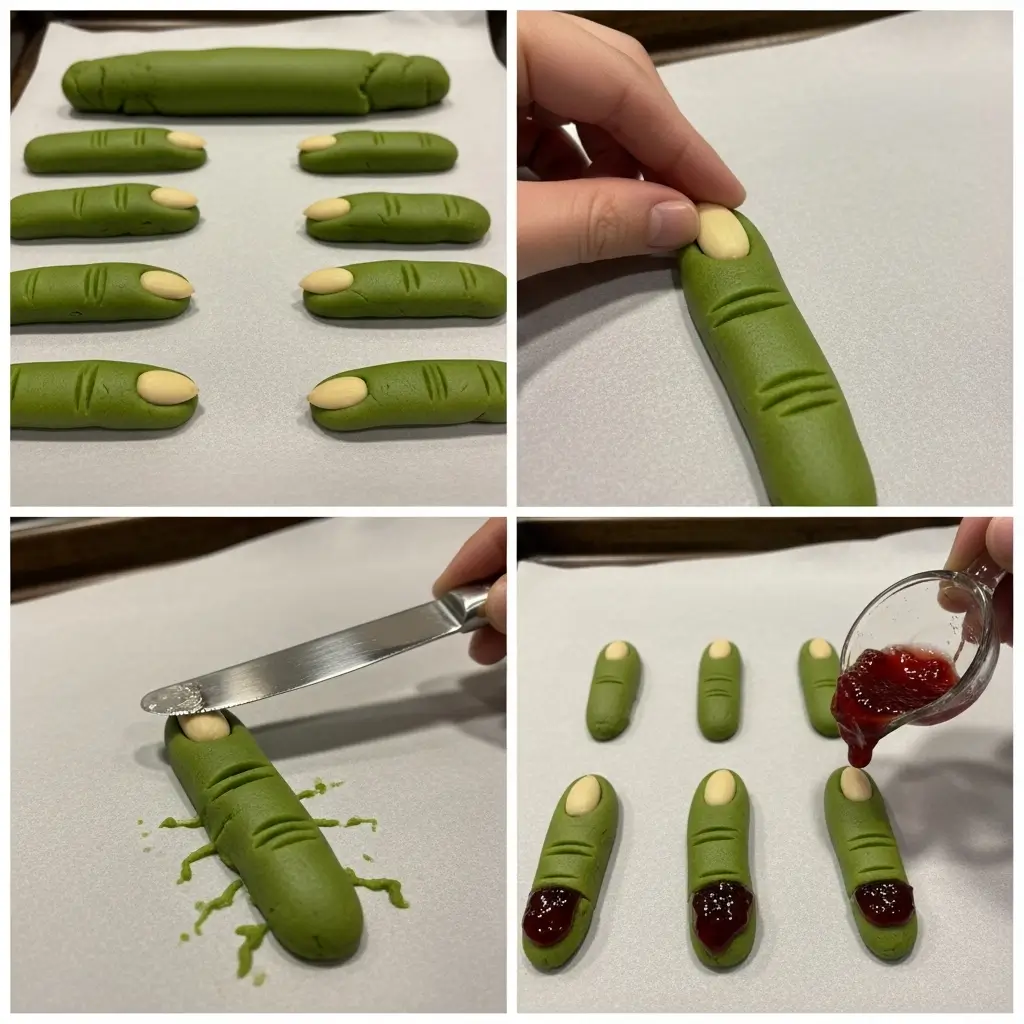
Take about a tablespoon of dough and roll it between your palms into a finger shape. I make mine about 3 inches long and roughly the thickness of my pinky finger. They don’t have to be perfect—actual fingers aren’t perfect either, right?
Here’s the thing—oh wait, I forgot to mention—make one test finger first and bake it to see if you like the size and thickness. That way you don’t shape 40 cookies only to realize they’re too thick or too thin. (Voice of experience here.)
Press an almond into one end for the fingernail. Push it in enough that it stays but not so hard it goes through the dough.
Now for the creepy part: Use your finger to gently pinch the dough about halfway down to make a knuckle. Just squeeze it a little so it looks like a finger joint.
Take a butter knife and make 2-3 little horizontal lines across the knuckle for wrinkles. Also make a line or two on either side of where the almond is to make it look like nail cuticles. The more uneven and random these lines are, the more realistic (and gross) they look.
Step 3: Bake These Spooky Halloween Treats
Place the fingers on your baking sheet, leaving about an inch between them. They don’t spread much but give them some space.
Bake for 20-25 minutes. They should be just starting to turn golden at the edges. Don’t overbake them or they’ll be too hard. These are shortbread-style cookies, so they should be slightly soft when they come out and will firm up as they cool.
Let them cool on the baking sheet for about 5 minutes before moving them to a cooling rack.
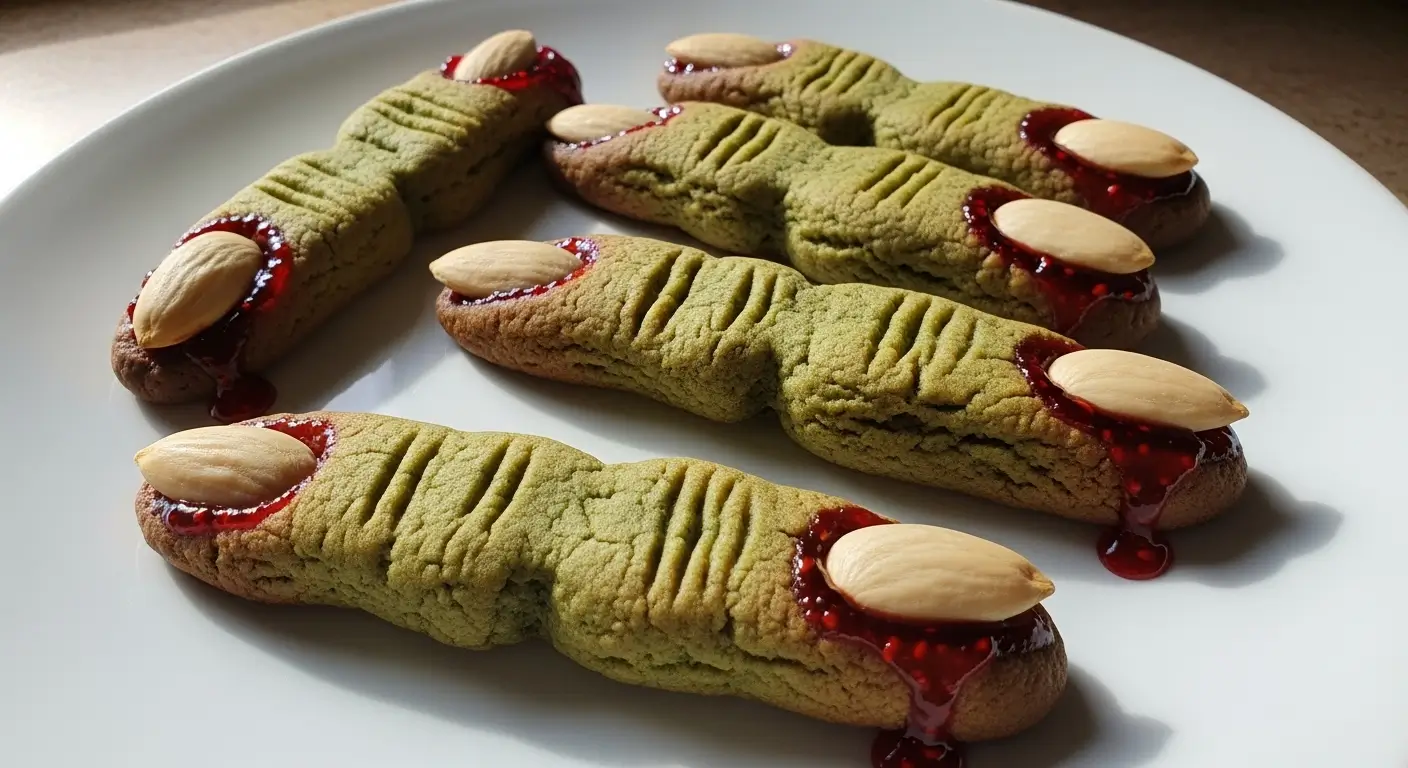
Step 4: Add the Blood (Best Part)
Once the cookies are completely cool, carefully remove the almond “fingernails.” They should pop off pretty easily.
Put a small amount of jam in the little cavity where the almond was. Then press the almond back on top so the jam oozes out a little. This is the “blood under the fingernail” effect and it’s disgustingly perfect.
You can also use the red decorating gel to add more “blood” around the knuckle or on the end of the finger. My kids go crazy with this part. One year my daughter added so much fake blood that the cookies looked like they’d been in a horror movie.
My Tips for These Halloween Party Cookies
After making these probably 20 times now (they’re requested every single Halloween), here’s what I know:
The dough can be made ahead. I’ve made it up to 2 days in advance and kept it wrapped in the fridge. Just let it sit at room temperature for like 10 minutes before shaping so it’s not rock hard.
Almonds sometimes crack when you’re splitting them. Have extras. I always buy more than I need because inevitably some break.
If you don’t have almond extract, you can use all vanilla, but they won’t taste as good. The almond flavor really makes these special. Maybe borrow some from a neighbor?
Kids LOVE helping shape these. Just accept that their fingers will look weird and lumpy and that’s okay. They’re supposed to be creepy witch fingers, not supermodel fingers.
Store them in an airtight container and add the jam right before serving. If you add jam and store them, the cookies get soggy. Not cute.
Why These Halloween Finger Cookies Work for Everyone
The great thing about this witch finger cookies with almonds recipe is that even picky kids will eat them. They’re basically butter cookies with a fun shape. My nephew won’t eat anything “weird” but he demolished four of these at our Halloween party.
And for the adults? They’re actually good cookies. Not just “good for Halloween cookies” but legitimately tasty. That almond extract really makes them stand out.
Plus, they’re a conversation starter. Everyone wants to know how you made them and they look way more complicated than they actually are. I’ve had multiple people ask if I went to culinary school. (I haven’t. I barely graduated high school cooking class.)
Serving These Bloody Witch Cookies
I usually arrange these on a platter lined with black napkins or tissue paper. Sometimes I scatter some plastic spiders around them for extra effect.
They’re perfect for Halloween dessert ideas cookies at parties because they’re easy to grab and eat while standing. No plates or forks needed.
You can also package them individually in clear cellophane bags tied with orange ribbon if you want to give them out as Halloween treats. Just put 2-3 fingers per bag and they look store-bought.
One year I made a “severed finger” cake and stuck these around the edges of it. People were grossed out and impressed at the same time, which is exactly what you want for Halloween.
Final Thoughts on This Halloween Cookies Recipe
These witches fingers cookies are honestly one of my proudest Halloween achievements. They’re easy enough that I don’t stress about making them, but impressive enough that people think I’m a baking wizard.
Are they perfect? Nope. Some of my fingers are skinnier than others, some of the knuckles are in weird places, and last year I accidentally made one with two knuckles that looked more like a toe than a finger. But that’s the beauty of it—witch fingers aren’t supposed to be perfect anyway.
If you’re looking for creepy finger cookies Halloween ideas that won’t make you want to give up and just buy store-bought cookies, these are it. Give them a try and let me know how gnarly yours turn out! Post a picture in the comments because I genuinely love seeing other people’s creepy cookie fingers. 🧙♀️🍪
[Recipe_Card]