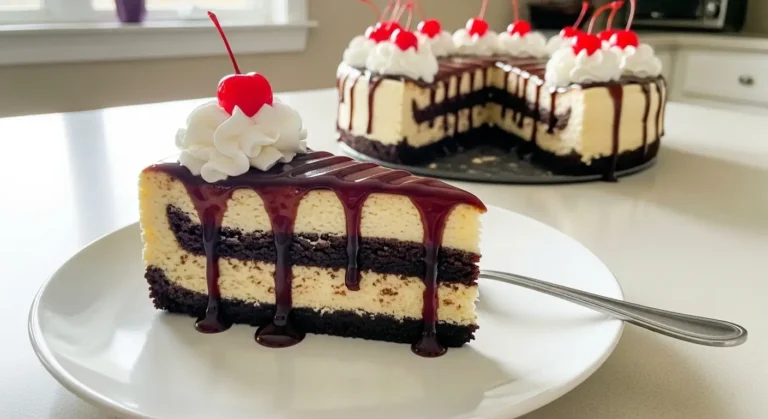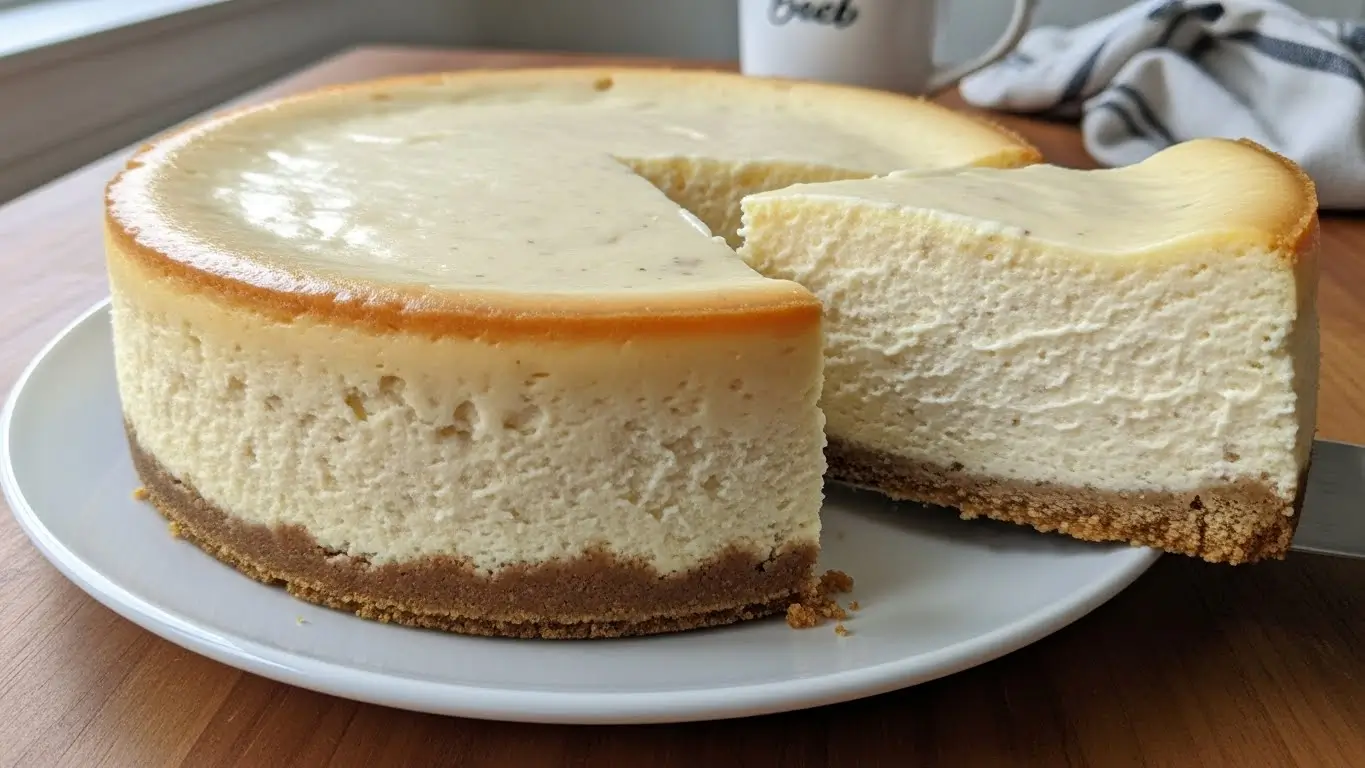
Okay, so vanilla bean brown butter cheesecake is basically what I make when I want people to think I’m a way better baker than I actually am. Everyone keeps asking for this recipe, so here goes nothing.
Look, I’m gonna be honest… the first time I tried making this, I burned the butter so badly that my apartment smelled like a bonfire for two days. My neighbor knocked on the door asking if everything was okay. Mortifying. But once I figured out how to actually brown butter without turning it into charcoal, this became THE dessert in my rotation.
Table of Contents
Why This Vanilla Bean Brown Butter Cheesecake Works
Cheesecake is one of those classic desserts that just works for everything—holidays, birthdays, random Tuesday nights when you need something fancy. But here’s the thing: most cheesecake recipes are either too basic or way too complicated with all these steps that don’t really matter.
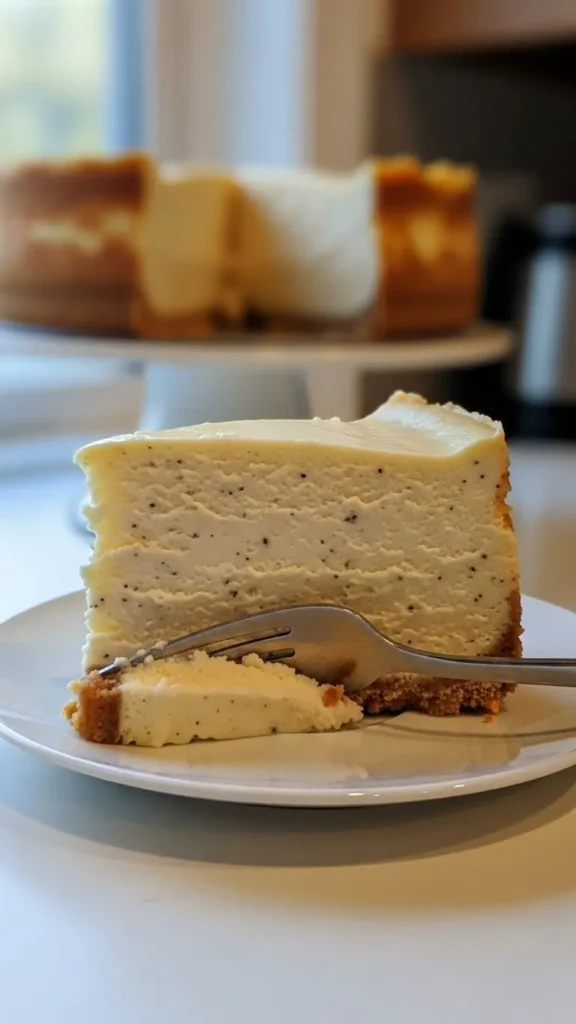
This one? It’s got that nutty, almost caramel-y flavor from the brown butter that makes people go “wait, what IS that?” in the best possible way. And the vanilla bean specks throughout make it look like you ordered it from some expensive bakery instead of making it in your slightly messy kitchen at 10 PM.
I think I originally got inspired by something I saw on Pinterest during lockdown when everyone was baking banana bread and I was like “nope, I’m doing cheesecake.” Or maybe it was from my aunt’s old recipe? Honestly can’t remember anymore. What I DO remember is version 1.0 being a complete disaster with cracks so deep you could hide spare change in them.
The Real Story Behind This Recipe
Now, here’s the thing about cheesecake: it used to intimidate me. Water baths, springform pans, overnight chilling, the risk of cracks everywhere… it all felt like too much work for something that might turn out terrible.
The key is—oh wait, I forgot to mention—you absolutely need to let your cream cheese come to room temperature. I learned this the hard way when I tried to beat cold cream cheese and ended up with lumpy filling that looked like cottage cheese. Not cute.
But once you nail the brown butter (watch it like a hawk, seriously) and get the texture right, this vanilla bean brown butter cheesecake is honestly better than most restaurant versions. And my 8-year-old, who literally picks everything apart and only eats like five foods, called this “the fancy cake” and asked for it three weekends in a row.
What You Need for This Creamy Vanilla Bean Cheesecake
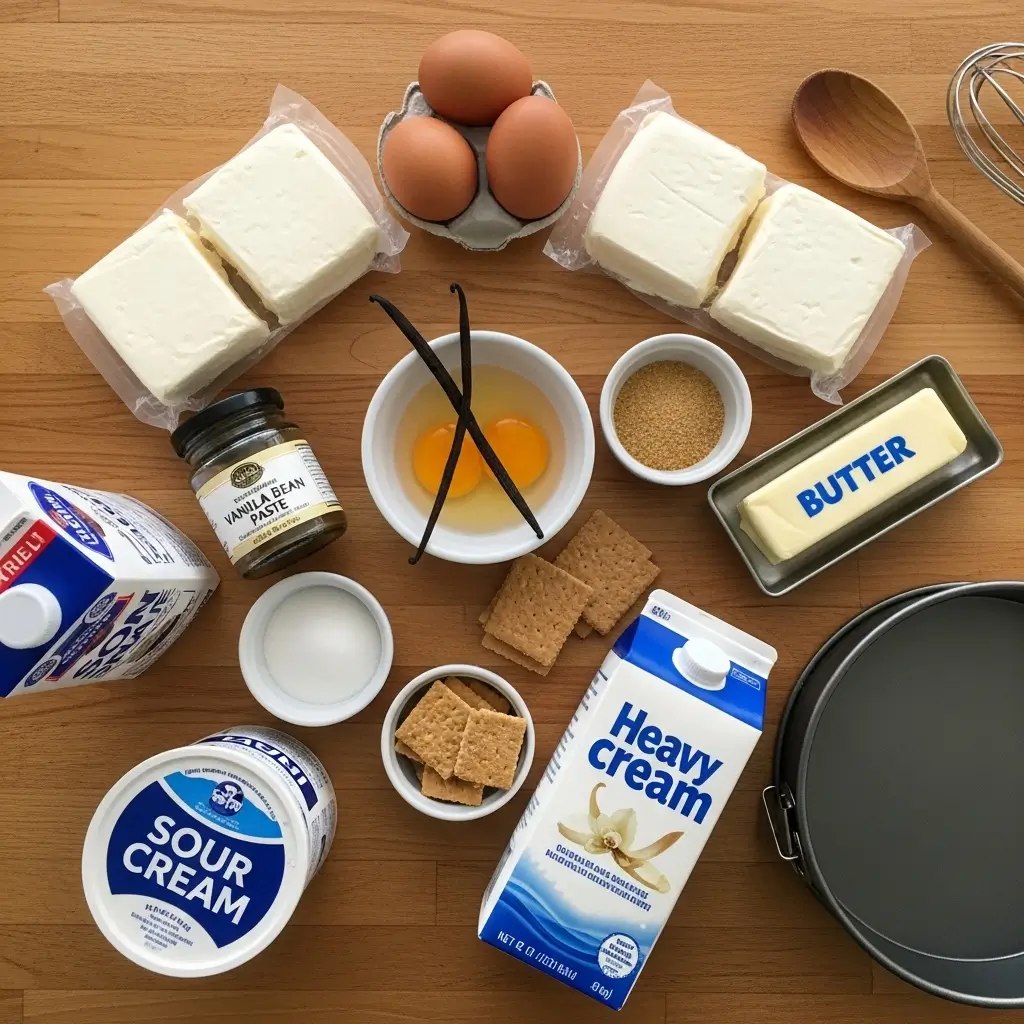
Let’s talk ingredients. Nothing too crazy, but there are a few non-negotiables:
For the Crust:
- 2 cups graham cracker crumbs (I use Honey Maid, but store brand works fine)
- 1/4 cup sugar
- Pinch of salt
- 1/2 cup unsalted butter (this is what you’ll brown—use UNSALTED or it’ll be too salty)
For the Filling:
- 32 oz cream cheese (four 8-oz blocks, and do NOT use low-fat. Just don’t. Trust me on this one)
- 1 cup granulated sugar
- 1/4 cup brown sugar (adds a tiny bit of that cozy flavor)
- 1 cup full-fat sour cream (I’ve used Greek yogurt when I ran out and it worked, but sour cream is better)
- 1/4 cup heavy cream
- 1 tablespoon vanilla bean paste OR seeds from one whole vanilla bean
- 1 teaspoon vanilla extract (double vanilla = double good)
- 4 large eggs, room temperature
- Pinch of salt
Speaking of ingredients, good luck finding vanilla beans that don’t cost like $8 each. I usually just grab the vanilla bean paste from Trader Joe’s because it’s way cheaper and you still get those pretty black specks.
How to Make Vanilla Bean Brown Butter Cheesecake (The Real Way)
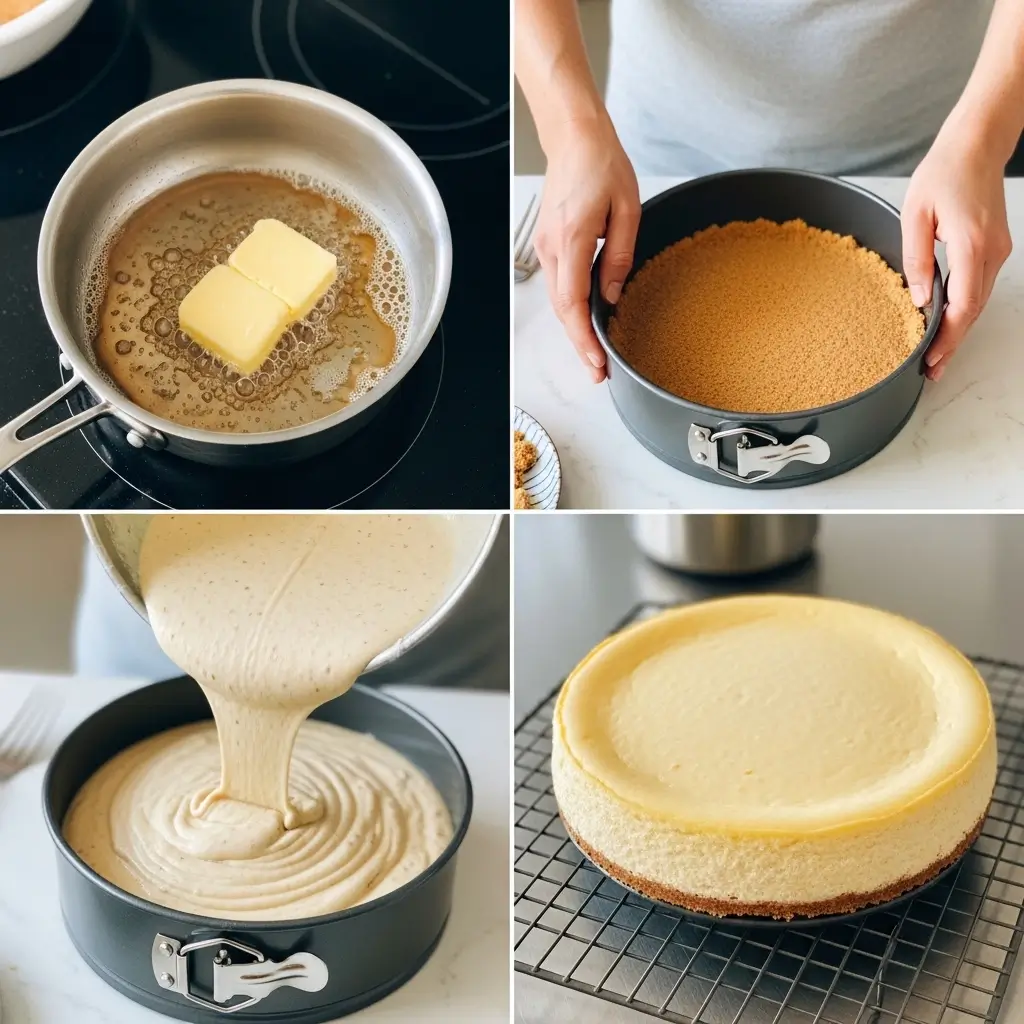
Step 1: Brown That Butter (Don’t Walk Away)
Preheat your oven to 325°F. Then melt the butter in a small saucepan over medium heat. It’ll foam up, then the milk solids will sink and start turning golden brown. You want it deep golden with a nutty smell, NOT black.
Set timer for like 5 minutes but honestly just stay there and watch it. Last Tuesday I walked away to check my phone and came back to burnt butter. Again.
Step 2: Make the Graham Cracker Crust
Mix the graham cracker crumbs, 1/4 cup sugar, and a pinch of salt in a bowl. Pour in the warm brown butter and stir until it looks like wet sand. Press it firmly into the bottom of a 9-inch springform pan (I use the bottom of a measuring cup to really pack it down).
Bake the crust for 10 minutes, then let it cool. This helps it stay crispy instead of getting soggy later.
Step 3: Prep the Water Bath (Yes, It Matters)
Wrap the outside of your springform pan in two layers of heavy-duty foil. This is annoying but necessary. Place the wrapped pan in a bigger roasting pan. You’ll add hot water later for the baking step, which keeps the cheesecake creamy instead of dry and cracked.
Step 4: Make the Silky Smooth Vanilla Cheesecake Filling
In a big bowl (or stand mixer if you’re fancy), beat the cream cheese until it’s completely smooth and fluffy. Like, REALLY beat it. Any lumps now will be there forever.
Add both sugars and beat again. Then add the sour cream, heavy cream, vanilla bean paste, vanilla extract, and a pinch of salt. Mix until it’s thick and glossy and you just want to eat it with a spoon (don’t, there are raw eggs coming).
Add the eggs ONE at a time on low speed. Don’t overmix here or you’ll get too much air, which causes cracks. The filling should be smooth and pourable but still pretty thick.
Step 5: Bake Low and Slow
Pour the filling over the cooled crust. Place the roasting pan in the oven, then carefully pour hot water into the roasting pan until it comes about halfway up the sides of the springform pan (learned this the hard way after spilling water everywhere my first try).
Bake at 325°F for 60-70 minutes. The edges should look set but the center should still jiggle a little when you shake the pan. If it’s puffed up like a soufflé, you’ve overbaked it.
Step 6: The Hardest Part—Waiting
Turn off the oven, crack the door open, and let the cheesecake sit inside for about an hour. This gradual cooling prevents cracks. Then take it out, remove the foil, and let it cool to room temperature.
After that, cover it and refrigerate for AT LEAST 6 hours, but overnight is way better. I know waiting sucks but cutting into it too early means soupy cheesecake. Been there, cried about it.
Step 7: Slice and Pretend You’re a Professional
Run a knife around the edge before unlatching the springform pan. Wipe your knife between each slice for those Instagram-worthy clean cuts. Serve it plain to really taste the brown butter and vanilla, or add whipped cream if you want.
Tips from Someone Who Messed This Up Multiple Times
- If the top cracks anyway (it happens), just spread some lightly sweetened sour cream or whipped cream on top. No one will know it cracked, they’ll just think you’re extra fancy.
- Make this the day before your event. The flavors get better and it slices cleaner.
- Store leftovers covered in the fridge for up to 5 days. If there ARE leftovers, which… doubtful.
- You can freeze slices individually wrapped for up to a month. Thaw in the fridge overnight.
Actually, you know what? This is even better on day two. Something about the brown butter flavor just settles in and gets more caramelly.
Why This Brown Butter Cheesecake Recipe Is Worth the Effort
Am I the only one who thinks regular vanilla cheesecake is kind of boring? The brown butter gives this whole nutty, toasted flavor that regular butter just can’t do. And the vanilla bean specks make it look expensive without actually being that hard.
This is way better than any grocery store cheesecake, and honestly rivals the ones from actual bakeries. Plus, when people ask “did you really make this from scratch?” and you get to say yes? That feeling is worth the effort.
If I can make this without setting off my smoke alarm (only happened twice), you can totally do this. Seriously, try this and tell me what you think. Let me know how yours turns out!
Happy baking (and may your butter brown perfectly on the first try) 🎂✨
[Recipe_Card]