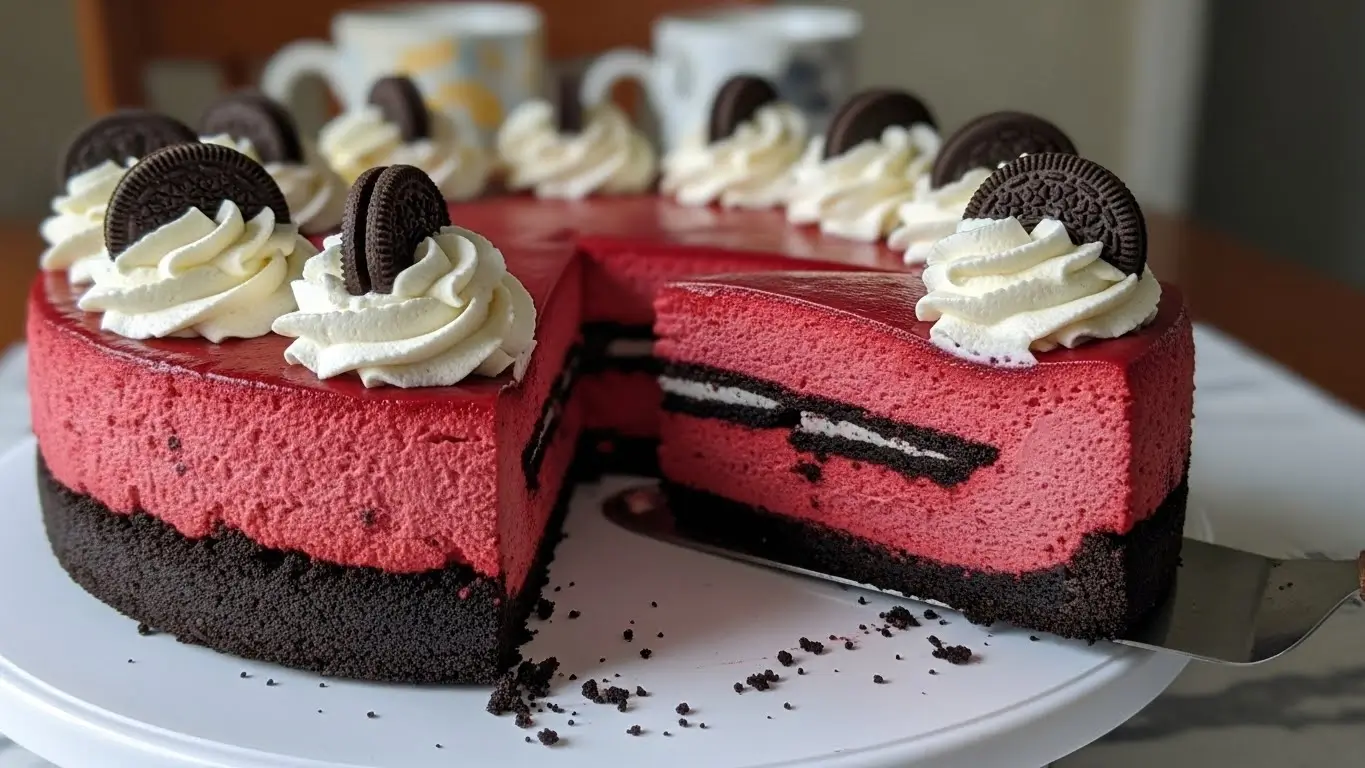
Red velvet oreo cheesecake is hands down the most dramatic dessert I’ve ever made, and honestly? It’s my secret weapon when I need to seriously impress someone. Okay, so I messed this up twice before getting it right, and the first attempt looked like a cracked red disaster that belonged in the trash, but now I’ve got it down to a science.
Look, I’m gonna be honest… I stumbled onto this recipe combo during Valentine’s Day last year when I couldn’t decide between making red velvet cake or Oreo cheesecake for a party, and my husband was like “why not both?” and I thought he was insane but also maybe brilliant? Turns out, combining them creates this ridiculously decadent thing that gets more compliments than anything else I’ve ever baked.
Table of Contents
Why This Easy Red Velvet Cheesecake with Oreo Crust Works
The combination sounds over-the-top, and it kind of is, but that’s the whole point. The rich, tangy cream cheese filling gets that signature red velvet flavor from cocoa powder and red food coloring, while the crushed Oreo crust adds this chocolatey crunch that’s just… chef’s kiss. And the color? It’s like baking a show-stopping statement piece that happens to taste incredible.
I think… no, I know this works better when you don’t overthink it. Some recipes make cheesecake seem impossible with all these fussy steps, but this one is pretty straightforward once you get past the fear of the water bath (more on that disaster later).
The key is—oh wait, I forgot to mention—you absolutely need to let your cream cheese come to room temperature or you’ll end up with lumpy filling like I did the first time. Disaster. Complete disaster.
The Story Behind My Best Red Velvet Oreo Cheesecake
Now, here’s the thing: I’m not usually a red velvet person. Too many bad experiences with dry cake that tastes like nothing except red dye. But cheesecake format? That changes everything. The cream cheese base is naturally tangy and moist, so you get actual flavor instead of just colored cake.
My neighbor Sarah swears by adding white chocolate chips to hers, but I tried it once and thought it was too sweet. Maybe I’m weird. Actually, you know what? Everyone’s got their own preferences with this recipe and that’s fine.
Failed attempt #1: I didn’t wrap my springform pan well enough for the water bath and water leaked in. Soggy Oreo crust. Not cute.
Failed attempt #2: I overbaked it because I panicked when the center was still jiggly. It turned into a dry, cracked mess.
But attempt #3? Perfection. Golden. The moment when you realize you’ve finally figured it out and can stop stress-eating the failures.
Ingredients for Creamy Red Velvet Oreo Cheesecake Filling
Let me break down what you actually need for this decadent red velvet oreo cheesecake dessert:
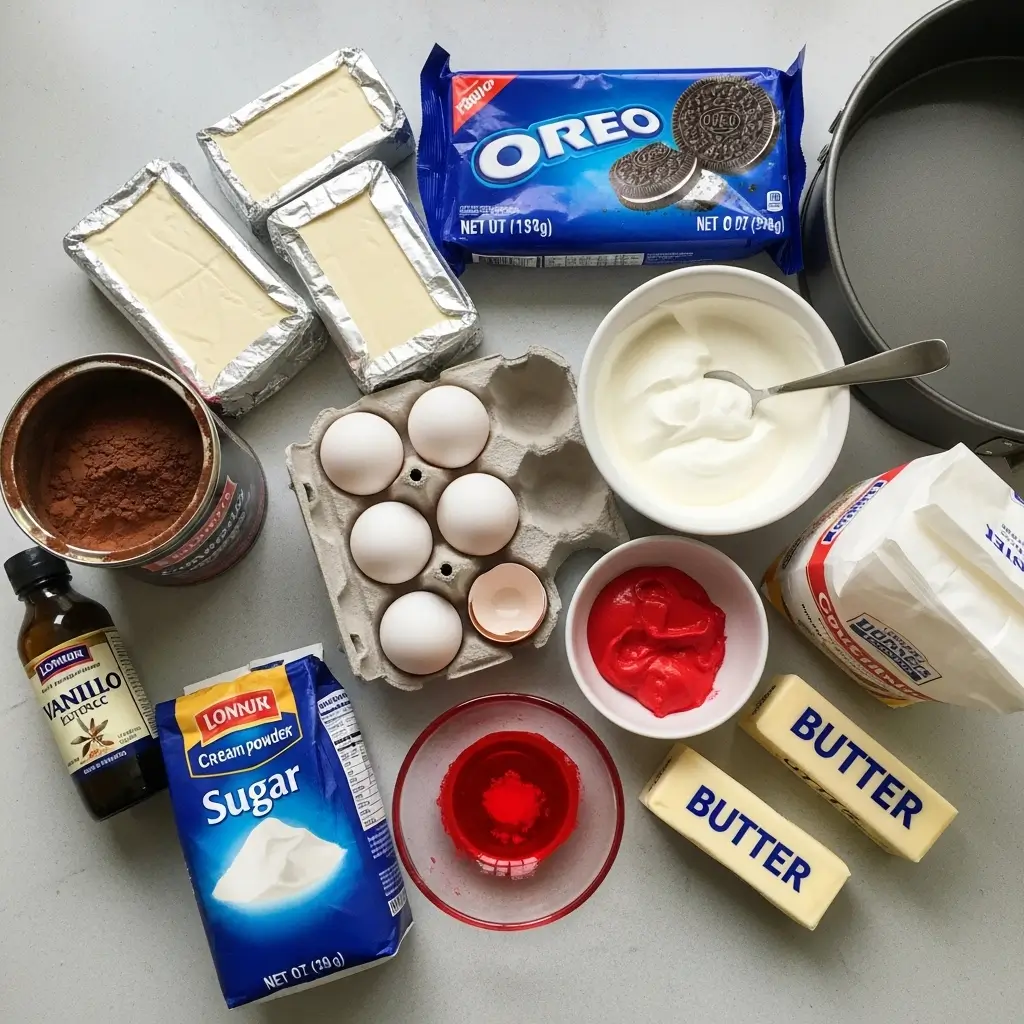
For the Oreo Crust:
- 24 Oreo cookies (I use regular, not Double Stuf—too rich)
- 5 tablespoons melted butter
- Pinch of salt
For the Red Velvet Cheesecake Filling:
- 32 oz (four 8-oz blocks) cream cheese, room temperature DO NOT skip this step
- 1 cup granulated sugar
- 3 tablespoons all-purpose flour (helps prevent cracking)
- 1 cup sour cream
- 1 tablespoon vanilla extract
- 3 large eggs, room temperature
- 2 tablespoons unsweetened cocoa powder
- 1-2 tablespoons red gel food coloring (liquid works but gel is better)
- Pinch of salt
Optional Toppings:
- Whipped cream
- Mini Oreos
- Chocolate ganache (I’m obsessed with this option)
- Extra crushed Oreos
Speaking of food coloring, good luck finding the gel kind that doesn’t cost $12 at some fancy baking store. I usually just grab the Wilton brand from any craft store and it works perfectly fine.
And another thing about Oreos: Don’t buy the off-brand sandwich cookies for the crust. Trust me on this one. They don’t taste the same and they’re weirdly dry. Just splurge the extra dollar for actual Oreos.
How to Make Red Velvet Cheesecake Oreo (No Crack Method)
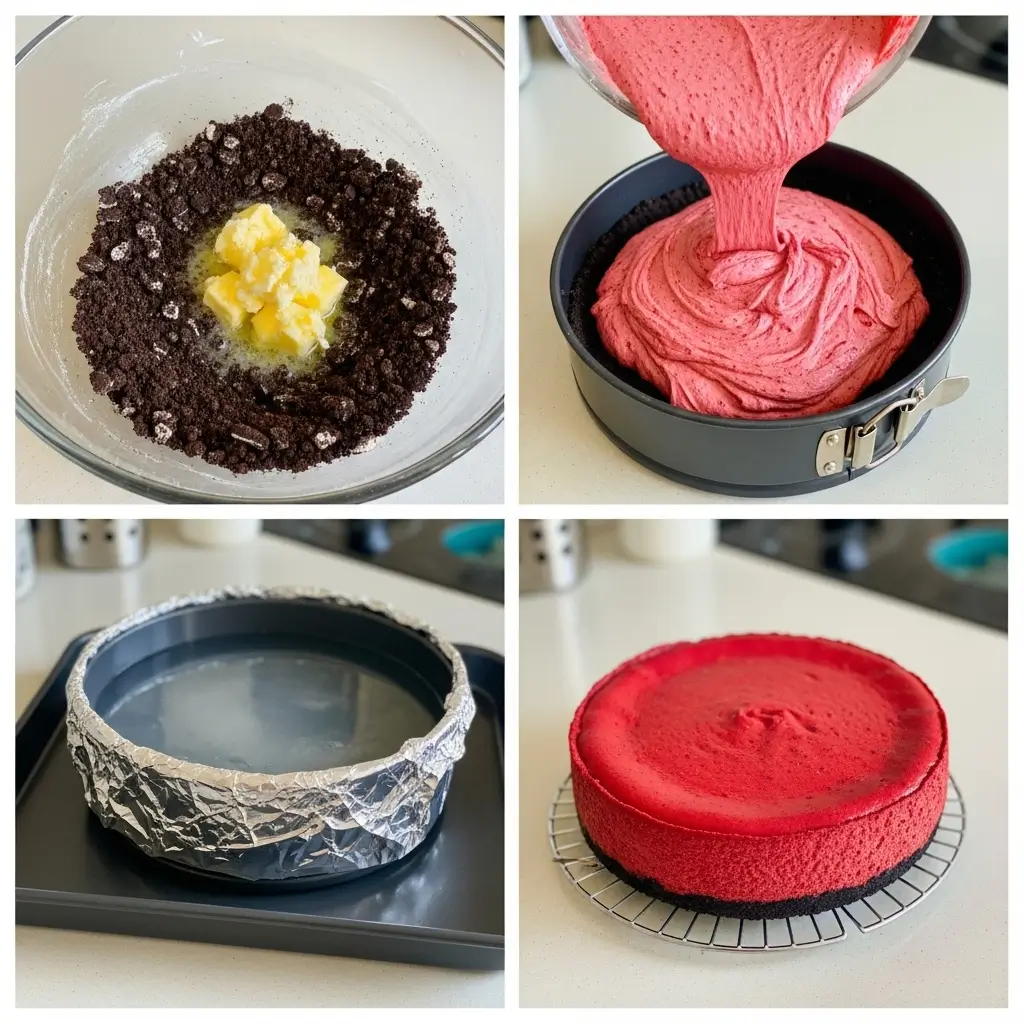
Step 1: Make That Chocolate Oreo Crust
Preheat your oven to 325°F (160°C). Crush the Oreos in a food processor until they’re fine crumbs—filling and all. If you don’t have a food processor, put them in a ziplock bag and go to town with a rolling pin. Excellent stress relief.
Mix the Oreo crumbs with melted butter and a pinch of salt until it looks like wet sand. Press firmly into the bottom of a 9-inch springform pan. I use the bottom of a measuring cup to really pack it down. Bake for 10 minutes, then let it cool while you make the filling.
Step 2: The Silky Smooth Red Velvet Cheesecake Filling
In a large bowl (or stand mixer if you’re fancy), beat the room-temperature cream cheese until completely smooth and fluffy. Like, REALLY beat it. 3-4 minutes minimum. Any lumps now will haunt you later.
Add the sugar and flour, beat until smooth. Mix in the sour cream and vanilla. Then add the eggs ONE at a time, mixing on low speed just until each one is incorporated. Don’t overmix at this stage or you’ll get cracks.
In a small bowl, mix the cocoa powder with the red gel food coloring until it forms a smooth paste (this prevents cocoa clumps). Add this to the cheesecake batter and fold gently until you get an even red color.
The batter should be thick, smooth, and that gorgeous deep red color. It’ll look weird at first, kinda streaky, but keep folding gently until it’s uniform.
Step 3: The Water Bath Technique (Don’t Skip This)
Wrap the outside of your springform pan in TWO layers of heavy-duty aluminum foil. Go all the way up the sides. This is your insurance against water leaking in.
Pour the red velvet filling over the cooled Oreo crust. Smooth the top with a spatula. Place the springform pan in a larger roasting pan, then put both pans in the oven. Carefully pour hot water into the roasting pan until it comes about halfway up the sides of the springform pan.
So, um, basically what happens is the water bath creates gentle, even heat that prevents cracks and keeps the texture super creamy. Worth the extra hassle, I promise (learned this the hard way).
Step 4: Bake Low and Slow
Bake at 325°F for 60-70 minutes. The edges should be set but the center should still have a slight wobble when you gently shake the pan. Set timer for 60 minutes, then check. Mine usually needs the full 70.
When done, turn off the oven, crack the door open slightly, and let the cheesecake cool in the oven for 1 hour. This gradual cooling prevents those annoying cracks from forming.
Step 5: Chill Overnight (The Hardest Part)
Remove from the oven and water bath, unwrap the foil, and let the cheesecake cool to room temperature. Then cover and refrigerate for at least 6 hours, but overnight is way better.
I know waiting is torture. But cutting into it too soon means soupy, messy slices instead of clean, beautiful ones. Have you ever tried this? Let me know in the comments because I’m curious if anyone else struggles with the waiting game.
Step 6: Decorate and Serve
Run a knife around the edge before releasing the springform pan. Top with whipped cream and mini Oreos, or go full fancy with chocolate ganache drizzle. I usually do a simple whipped cream border with crushed Oreos because I’m lazy but it looks impressive enough.
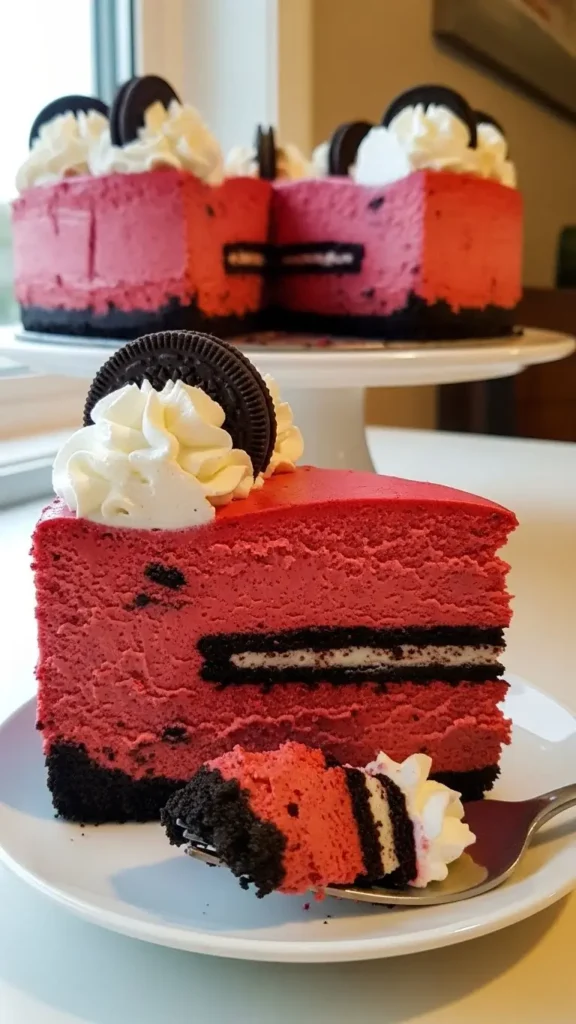
Red Velvet Oreo Cheesecake Decoration Ideas
Wait, I almost forgot the fun part—decorating! You can go super simple or absolutely wild with this:
- Classic: Whipped cream rosettes around the edge with mini Oreos
- Decadent: Pour chocolate ganache over the top and let it drip down the sides
- Extra: Cream cheese frosting piped on top like it’s a layer cake
- Minimal: Just dust with cocoa powder through a stencil
Honestly got a little teary-eyed when my mom tried this at my birthday last month and said it was “better than any bakery cheesecake” she’d ever had. That’s when I knew I’d nailed it.
Make Ahead Tips for This Ultimate Red Velvet Oreo Cheesecake
Actually, this is the PERFECT make-ahead dessert because it HAS to chill overnight anyway. Make it two days before your event, keep it covered in the fridge, and decorate it the day you’re serving. Takes all the stress out.
You can also freeze slices individually wrapped for up to 2 months. Thaw in the fridge overnight and they’re just as good as fresh.
Am I the only one who thinks cheesecake tastes better on day two? Something about the flavors settling in just makes it richer and more cohesive.
People keep asking for the recipe, so I guess I did something right. This is way better than any restaurant version I’ve tried, and it costs like a third of what you’d pay at Cheesecake Factory.
Seriously, try this and tell me what you think! Anyone else have tricks for making this even better?
Happy baking (and may your water bath stay leak-free)! 🍰❤️
[Recipe_Card]