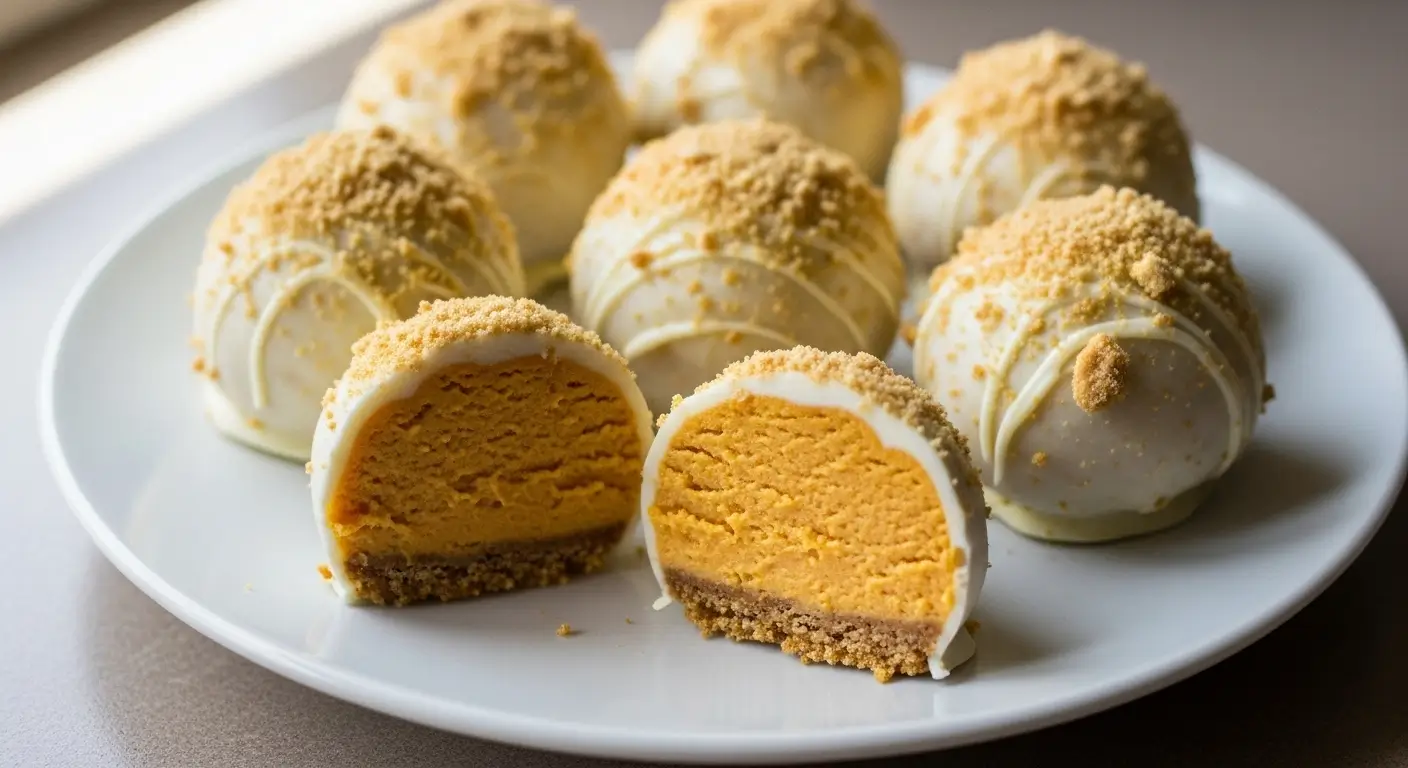
No Bake Pumpkin Cheesecake Balls (My New Fall Addiction)
Everyone in my neighborhood thinks I’m some kind of dessert wizard now because of these no bake pumpkin cheesecake balls. Like, my neighbor Karen literally knocked on my door yesterday asking if I could make them for her book club. Karen has never asked me to make anything before. That’s how good these are.
And the best part? No oven required. Which is perfect because it’s still kinda warm out and I don’t want to heat up my whole kitchen just to make DESSERT.
Table of Contents
Why These Easy Pumpkin Cheesecake Balls Are Dangerous
Look, I’m gonna be honest—I ate seven of these in one sitting. SEVEN. My husband came home and was like “Where did half the batch go?” and I just stared at him innocently while chewing. He knows. He always knows.
These homemade pumpkin cheesecake bites are basically pumpkin cheesecake meets truffle meets fall happiness. They’re creamy, they’re sweet, they’ve got that perfect pumpkin spice thing going on, and you can make them while watching TV. No judgment here.
The Slightly Messy Origin of This Pumpkin Spice Cheesecake Balls Recipe
I think I first saw something similar on Instagram? Or maybe Pinterest. Honestly, fall hits and my social media feeds turn into a pumpkin explosion, so who even knows anymore. But I’ve tweaked this recipe so many times that it’s basically mine now.
First attempt: I didn’t chill the mixture long enough because I’m impatient. Tried to roll them into balls and they were basically pumpkin soup. Just… melting in my hands. Had to stick them back in the fridge for another hour while I cleaned pumpkin goo off my counter.
Second try: I used way too much pumpkin puree thinking “more pumpkin = more flavor.” Wrong. They were wet and wouldn’t hold their shape even after chilling. My dog thought they were toys and tried to eat one off the counter. Chaos.
Third time? Perfect. Finally got the ratios right and now I can’t stop making them.
Ingredients for This No Bake Pumpkin Dessert
Here’s what you need. Nothing crazy, mostly pantry stuff if you’re a fall baking person like me.
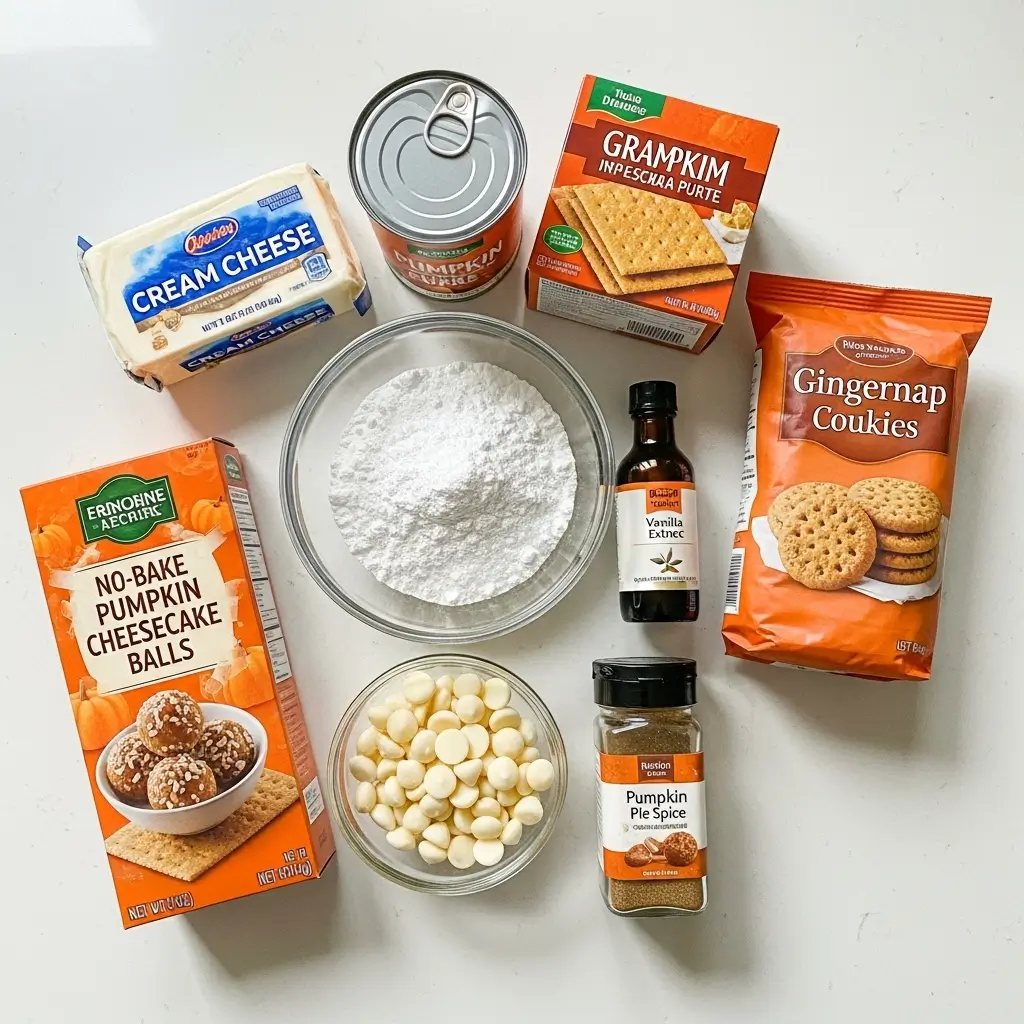
For the cheesecake balls:
- 8 oz cream cheese, softened (let it sit out for like an hour—IMPORTANT)
- ½ cup pumpkin puree (NOT pumpkin pie filling)
- ⅓ cup powdered sugar
- 1 teaspoon vanilla extract
- 1½ teaspoons pumpkin pie spice
- ¼ teaspoon salt
- 1 cup graham cracker crumbs (about 8-10 crackers crushed)
- ½ cup gingersnap cookie crumbs (optional but amazing)
For the coating:
- 10 oz white chocolate chips or candy melts
- 2 teaspoons coconut oil (helps the chocolate get smooth)
- Crushed graham crackers or chopped pecans for rolling
Shopping tip: Make absolutely sure you get pumpkin puree and not pumpkin pie filling. I grabbed the wrong can once and the balls were disgustingly sweet and had weird spices already in them. The can should just say “100% pure pumpkin.”
How to Make These Pumpkin Cream Cheese Balls
Step 1: Beat That Cream Cheese
In a large bowl, beat the softened cream cheese with an electric mixer until it’s completely smooth. Like, really beat it. Get out your stress. This takes about 2 minutes.
If your cream cheese isn’t soft enough, you’ll have lumps. And nobody wants lumpy cheesecake balls. Trust me on this one.
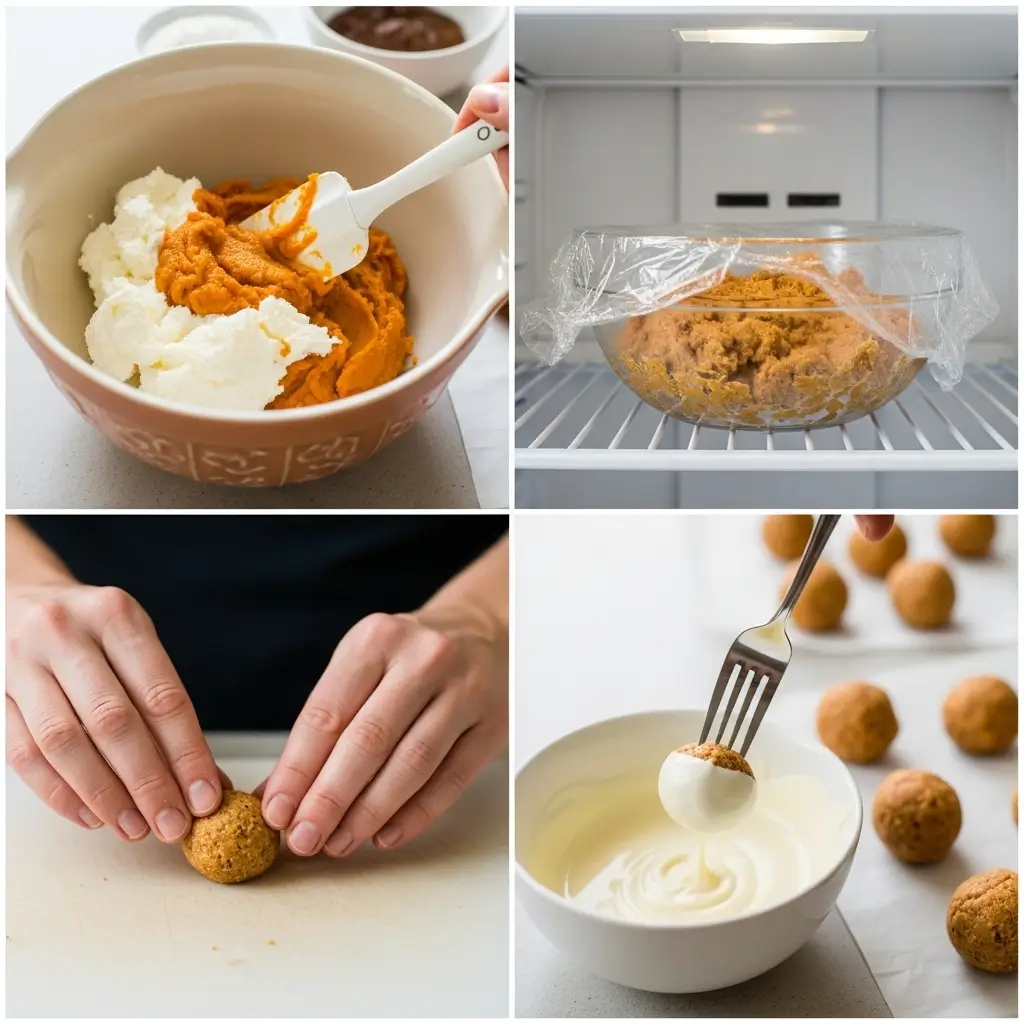
Step 2: Add the Pumpkin Stuff
Add the pumpkin puree, powdered sugar, vanilla, pumpkin pie spice, and salt. Beat until everything is combined and smooth and beautiful.
It’ll be this gorgeous orange color. If it’s not orange enough for you (it happens), you can add like a tiny drop of orange food coloring. But honestly? I never bother.
Step 3: Mix in the Crumbs
Fold in the graham cracker crumbs and gingersnap crumbs if you’re using them. The mixture will get thicker and more scoopable. This is what you want.
If you skip the gingersnaps (which is fine), you might need to add a few extra tablespoons of graham cracker crumbs to get the right consistency. The mixture should be thick enough to hold a shape but not crumbly.
Step 4: Chill Out (Literally)
Cover the bowl with plastic wrap and stick it in the fridge for at least 2 hours. I usually do mine for 3 hours because I’m paranoid after that first melty disaster.
This is the hardest part because the mixture smells SO GOOD and you’ll be tempted to skip this step. Don’t. You need it to firm up or you’ll just have pumpkin mush.
Step 5: Roll Those Fall Pumpkin Treats
Line a baking sheet with parchment paper. Use a small cookie scoop (about 1 tablespoon size) to scoop out portions of the chilled mixture.
Roll each portion into a ball between your hands. Work quickly because the warmth of your hands will start to melt them. If they get too soft, stick them back in the fridge for 15 minutes.
Place the rolled balls on the prepared baking sheet and freeze for 30 minutes. This makes coating them WAY easier.
Step 6: Coat in White Chocolate
Melt the white chocolate chips with the coconut oil in a microwave-safe bowl. Heat in 30-second intervals, stirring between each one, until it’s completely smooth.
Let it cool for like 2 minutes so it’s not screaming hot. If the chocolate is too hot, it’ll melt your pumpkin balls. Been there.
Using a fork, dip each ball into the white chocolate and roll it around to coat. Let the excess drip off, then place it back on the parchment paper.
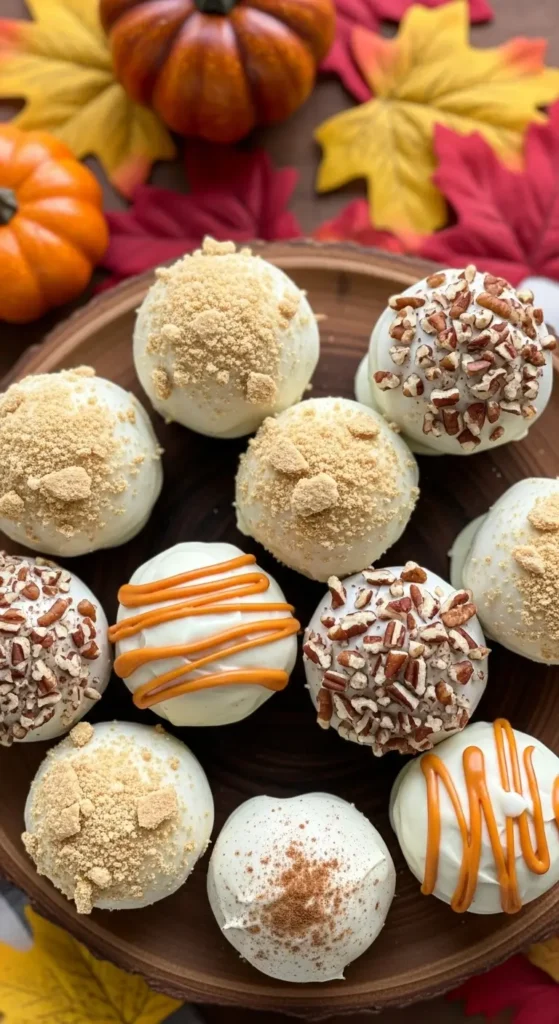
While the chocolate is still wet, roll it in crushed graham crackers or chopped pecans if you want. I usually do half and half because I can’t make decisions.
Step 7: Let Them Set
Put the coated balls in the fridge for at least an hour to let the chocolate harden. Then they’re ready to eat!
Tips for These Easy Pumpkin Dessert Bites
The cream cheese temperature is everything. Cold cream cheese = lumps. Room temp cream cheese = smooth perfection. Leave it out for at least an hour before you start.
Don’t skip the chilling times. I know it’s annoying to wait, but this is a no-bake recipe. The fridge is your oven. You need those chill times.
Use a cookie scoop. It makes them all the same size and way less messy. I use a 1-tablespoon scoop and get about 20 balls.
Work fast when rolling. Your hands are warm and will melt the mixture. If things start getting too soft, pop everything back in the fridge.
Store them cold. These need to stay in the fridge. They’ll get soft at room temperature. Not melty, just soft.
What to Serve with These Pumpkin Cheesecake Candy Recipe
Honestly? Nothing. They’re perfect on their own.
But they’re great for:
- Fall parties (Karen’s book club, apparently)
- Thanksgiving dessert table
- Halloween treats
- Random Tuesday when you need pumpkin in your life
- Gifts for neighbors (wrap them in a cute box and suddenly you’re everyone’s favorite)
We usually make these when we have people over and everyone loses their minds. Last weekend my sister ate five and then tried to take the rest home. I had to hide them in the vegetable drawer where I knew she wouldn’t look.
Can You Make These No Bake Pumpkin Snacks Ahead?
Yes! Actually, you should. These pumpkin truffles keep in the fridge for up to a week in an airtight container. Just layer them with parchment paper so they don’t stick together.
You can also freeze them for up to 2 months. Freeze them on a baking sheet first, then transfer to a freezer bag once they’re solid. Thaw in the fridge before serving.
I usually make a double batch and freeze half because future me always appreciates having dessert ready to go.
Why This Pumpkin Spice Treats Recipe Works
These no bake pumpkin cheesecake balls are the perfect fall treat—easy enough for a weeknight but impressive enough for a party. They taste like fancy pumpkin cheesecake but require zero baking skills.
Plus they’re adorable. Little round balls of autumn happiness coated in white chocolate? Come on. That’s Instagram-worthy right there.
My mother-in-law asked for the recipe, which is how I know they’re legitimately good because she’s never asked for any of my recipes before. She made them for her bridge group and now all her friends want the recipe too. I’ve created a pumpkin cheesecake ball cult.
Seriously, make these. They’re easy, they’re delicious, and they make your whole house smell like fall. What more do you want?
Let me know if you try them! And if you have tricks for making them even better, drop them in the comments. 🙂
[Recipe_Card]