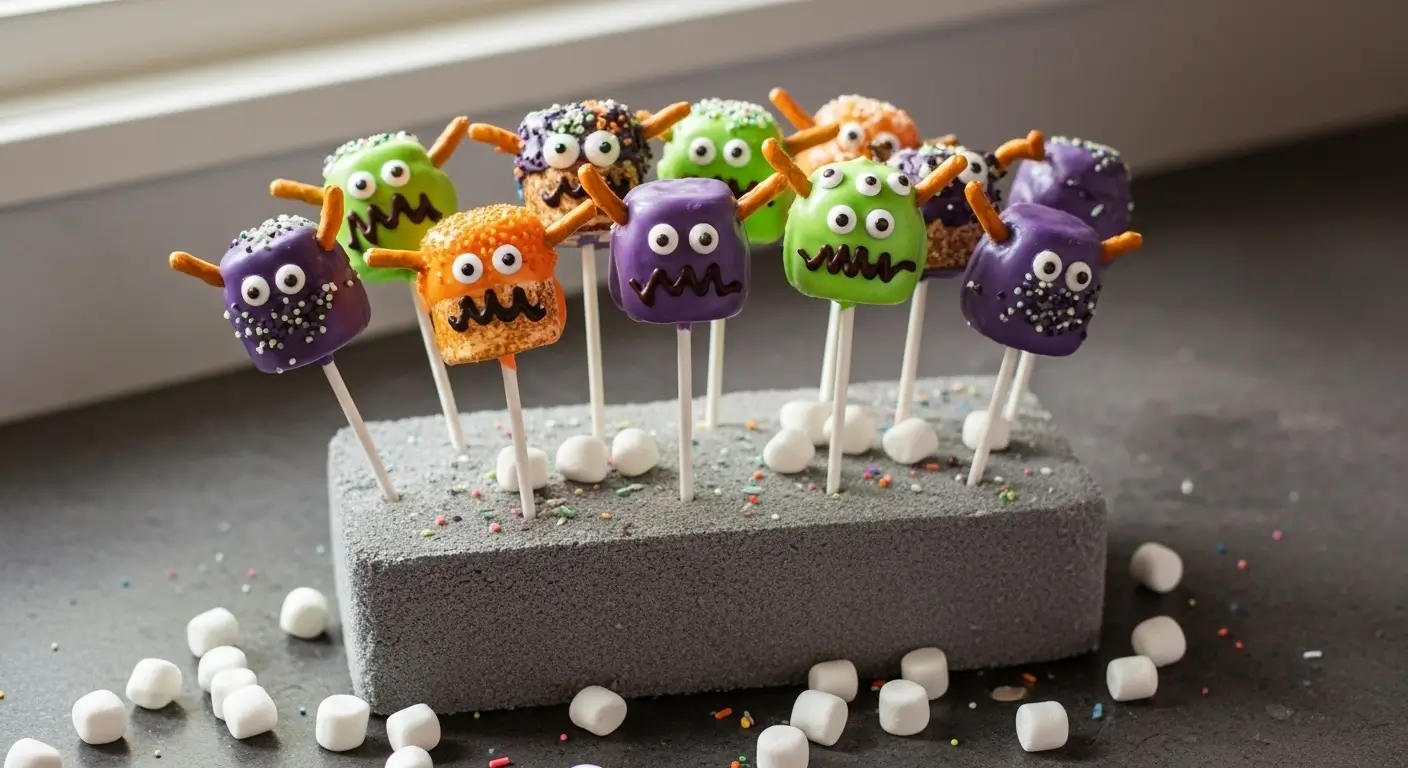
So my daughter came home from school last week asking if we could make “those cute monster things on sticks” for her Halloween class party. I had NO idea what she was talking about until she showed me a picture on her friend’s mom’s Instagram. Monster marshmallow pops. Of course.
Now, here’s the thing—I’ve never been the Pinterest-perfect mom. My Halloween cookies usually look like they got into a fight with the oven and lost. But these? These looked doable. Like, actually doable. And I was right. Sort of.
Table of Contents
Why Monster Marshmallow Pops Are My New Favorite
Look, I’m gonna be honest with you. I tried making cake pops once. ONCE. It was a disaster. Complete disaster. They fell off the sticks, the coating was lumpy, and I’m pretty sure I cried a little. But these Halloween marshmallow pops recipe treats? They’re basically cake pops for people who can’t do cake pops.
The marshmallow is already the perfect shape. You’re not mixing and rolling and praying they hold together. You literally stick a stick in a marshmallow and dip it in chocolate. If I can do it while simultaneously helping with homework and feeding the dog, anyone can.
What You Need for These Easy Halloween Treats
Here’s what you need for these monster marshmallow treats:
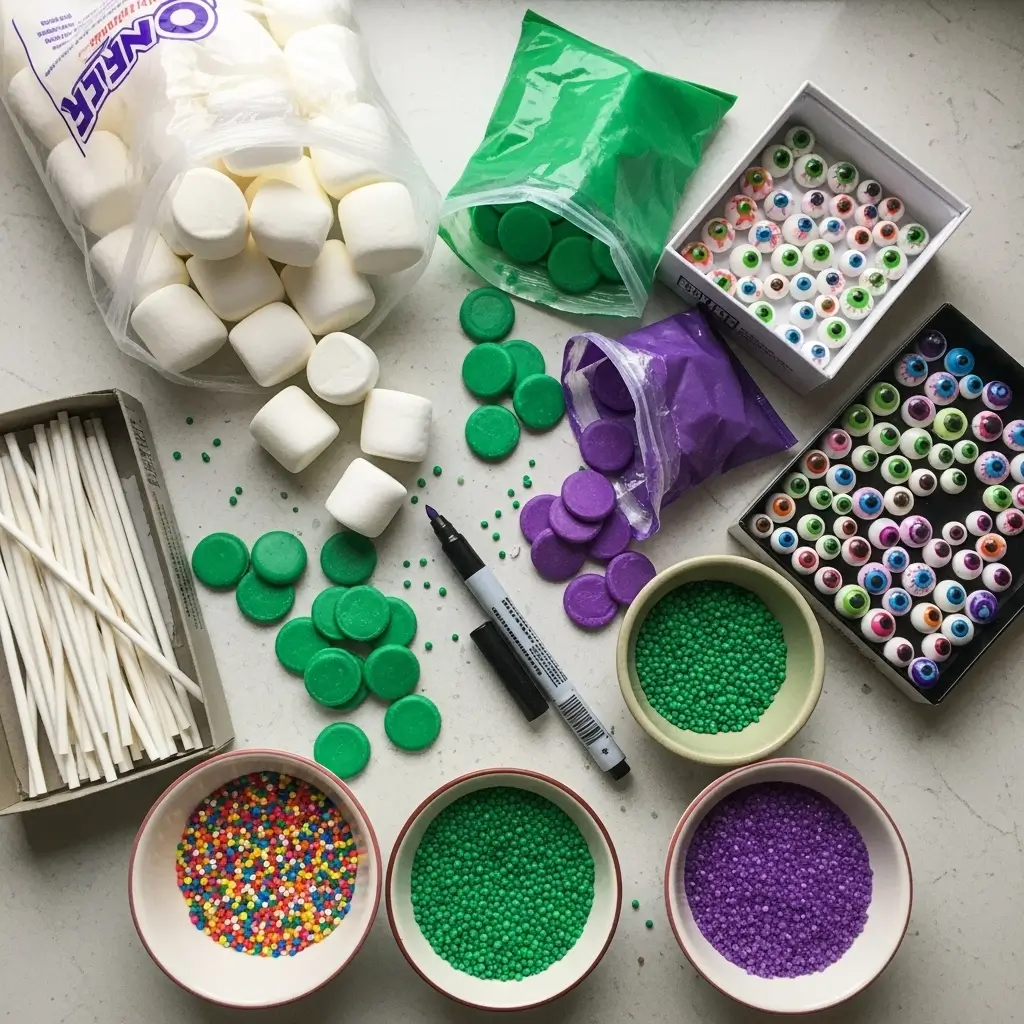
Main stuff:
- Large marshmallows (I use Jet-Puffed because that’s what Target always has)
- Candy melts in green, purple, or orange (Wilton brand works great)
- Lollipop sticks or cake pop sticks
- Candy eyeballs (found these at Walmart in the baking aisle)
- Sprinkles for “hair” (any color works, but I love the crazy rainbow ones)
Optional but fun:
- Black edible marker for drawing mouths
- Different colored candy melts if you want variety
- Mini chocolate chips for extra details
- Food-safe gel tubes for drawing
Shopping tip: Don’t buy the mini marshmallows thinking you’ll make mini versions. Trust me. I tried. They’re too small to dip properly and you’ll just end up frustrated. Go with the regular large ones.
How to Make Monster Marshmallow Pops (The Real Way)
Okay, let me walk you through this. And by “walk through,” I mean tell you what I did wrong so you don’t repeat my mistakes.
Step 1: Prep Your Workspace
Before you start melting anything, get EVERYTHING ready. Seriously. Candy melts harden fast, and you don’t want to be scrambling for sprinkles while your chocolate is turning into a brick.
Set up:
- A plate or tray lined with parchment paper
- Small bowls for each sprinkle color
- Your candy eyeballs within reach
- A piece of styrofoam or a cardboard box with holes poked in it (for standing the pops upright to dry)
That last one—the styrofoam thing? Game changer. I didn’t have it the first time and ended up holding wet marshmallow pops in my hands for like 10 minutes waiting for them to dry. Learn from my pain.
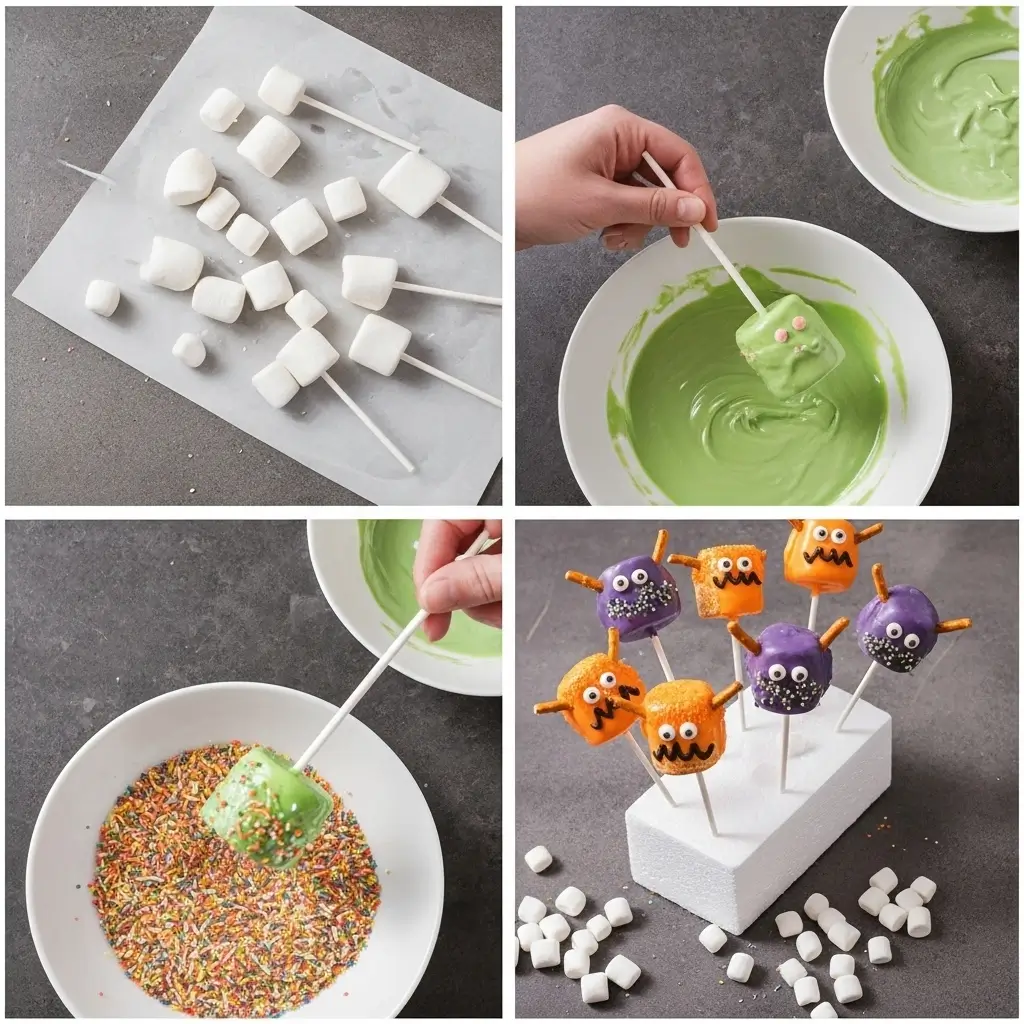
Step 2: Stick Your Marshmallows
Push a lollipop stick into the bottom (flat side) of each marshmallow. Push it in about halfway—you want it secure but don’t poke it all the way through. I did that on my first three and they looked like marshmallow kebabs. Not cute.
Pro tip I learned accidentally: if you dip the stick end in melted chocolate first, then push it into the marshmallow, it creates a seal and the marshmallow won’t slide off later. But honestly? I usually skip this step because I’m lazy and they stay on fine anyway.
Step 3: Melt Your Candy Melts
I use the microwave because I don’t have time for double boilers. Put your candy melts in a microwave-safe bowl and heat for 30 seconds. Stir. Heat for another 20 seconds. Stir again. Keep doing this until they’re smooth and melted.
DO NOT RUSH THIS. I tried microwaving for a full minute once and burned the chocolate. It seized up into this weird chalky substance and I had to throw it away and start over. Slow and steady wins the race here.
If your melted chocolate seems too thick, add a tiny bit of vegetable oil or shortening. Like, a half teaspoon at a time. Stir it in and it’ll thin out nicely.
Step 4: Dip and Decorate
Now for the fun part! Hold your marshmallow by the stick and dip it into the melted candy. You can do just the top half, or cover the whole thing—whatever you want. I usually do about two-thirds of the marshmallow because I think it looks more “monster-y.”
Let the excess drip off, then IMMEDIATELY (and I mean immediately) dip the top into sprinkles or whatever you’re using for hair. The chocolate hardens fast, so you’ve got maybe 10-15 seconds to get those sprinkles on.
Stick it upright in your styrofoam holder and quickly add the candy eyes while the chocolate is still wet. They’ll stick right on. If you wait too long, you’ll have to dab a tiny bit of melted chocolate on the back of each eye to make them stick. (Learned this the hard way on marshmallow number 7.)
Step 5: Add the Face
Once the chocolate is completely dry (takes about 15-20 minutes), use a black edible marker to draw a mouth. Squiggly lines, fangs, surprised faces—whatever. My 6-year-old nephew drew mouths on half of mine and they look insane but the kids loved them.
You can also use black icing gel if you don’t have a marker, but the marker is easier and less messy.

My Tips for These No Bake Halloween Desserts
After making these approximately 40 times now (not kidding, my daughter’s class has 22 kids and I made extras), here’s what I know:
Use a deep, narrow bowl for melting chocolate. Regular bowls are too wide and you need like three bags of candy melts to get enough depth. I use these small Pyrex prep bowls and they’re perfect.
Keep baby wipes nearby. Candy melts get EVERYWHERE. On your hands, the counter, somehow in your hair. Baby wipes are your friend.
If the chocolate starts hardening while you’re working, just pop it back in the microwave for 10-15 seconds. Don’t try to work with hardening chocolate. It won’t coat smoothly and you’ll just get frustrated.
Let kids help with decorating. They’re not going to be perfect, and that’s okay. My daughter made one with three eyes and called it a “mutation monster.” Creative, I guess?
Make extras. Someone will drop one. Someone will eat one before you can count them. Just make extras.
Storage and Planning Ahead
These make ahead Halloween desserts are actually great for preparing in advance. You can make them up to a week before you need them. Just store them in an airtight container at room temperature with parchment paper between layers so they don’t stick together.
Don’t refrigerate them—the marshmallows get weird and sticky in the cold. Room temp is perfect.
Want to package them as Halloween treats? I put each one in a clear cellophane bag, tie it with orange or black ribbon, and they look store-bought. Great for Halloween class party treats or trick-or-treaters.
Why Kids (and Adults) Love These
The best part about these Halloween treats for kids is that they’re not too scary for the little ones but still fun enough for older kids. My 3-year-old calls them “happy monsters” and my teenager ate five when she thought I wasn’t looking.
They’re also a great activity to do WITH kids on a rainy weekend. Set up all the supplies, let them decorate their own monsters, and you’ve got an easy afternoon activity that produces edible results. Win-win.
My mom made these with my nieces last weekend and sent me a picture. Her monsters had eyelashes drawn on with the food marker and little hair bows made from fruit leather. I didn’t even know fruit leather could do that. Point is, you can get as creative or as simple as you want.
Final Thoughts on These Chocolate Covered Marshmallow Pops
These monster marshmallow pops saved my sanity when I needed to bring something to the school party. They look impressive but take maybe 20 minutes start to finish once you get in a rhythm. Nobody needs to know how easy they actually were.
Are they Pinterest-perfect? Probably not. But they’re cute, they’re tasty, and most importantly, they didn’t require me to turn on my oven or measure anything precisely. That’s a win in my book.
Give them a try! And seriously, let me know how yours turn out. Did you make Frankensteins? Vampires? Three-eyed mutations? Drop a comment because I love seeing what other people come up with. 👾🍬
[Recipe_Card]