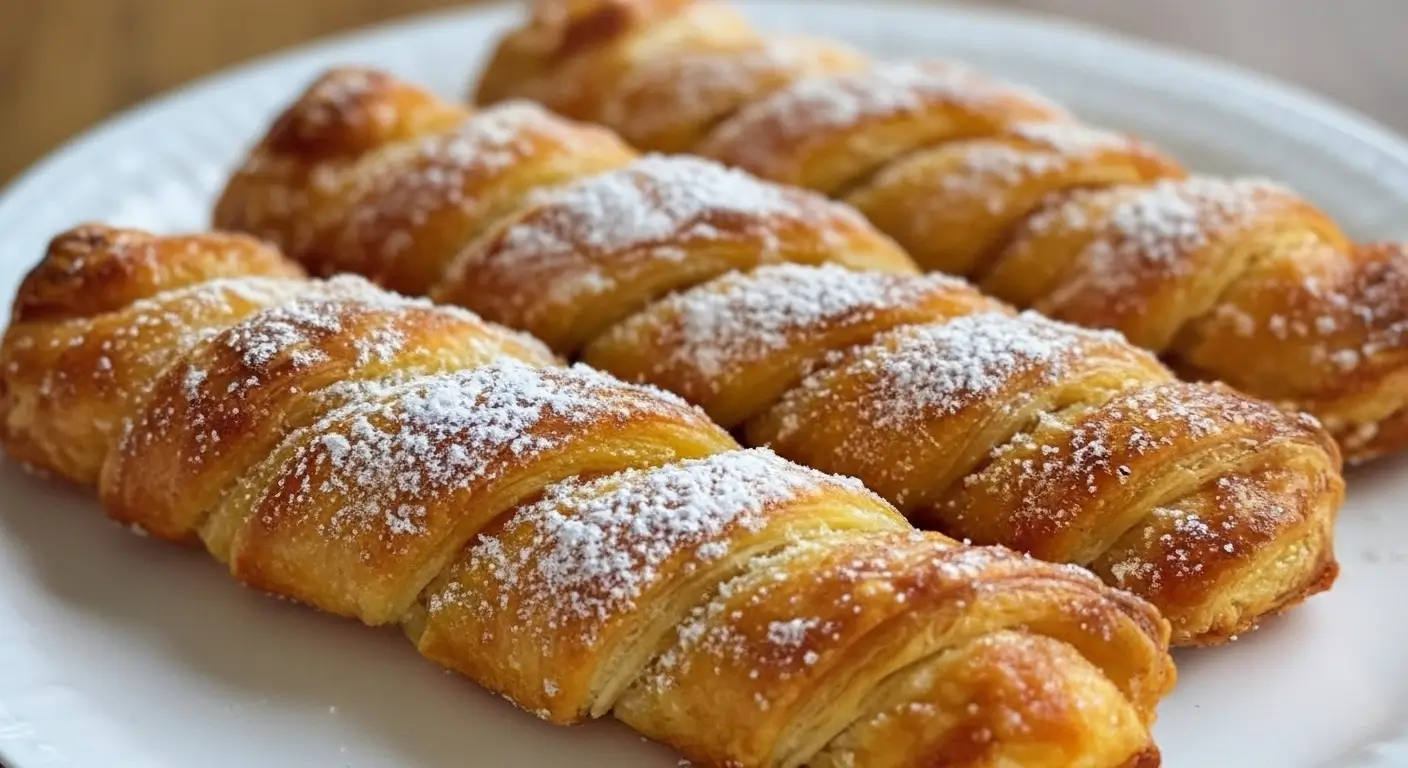
Flaky Pumpkin Pie Twists That Look Way Fancier Than They Are
Everyone keeps asking for this recipe, so here goes nothing. I’ve been making these flaky pumpkin pie twists for about a year now, and honestly, they’re one of those things that people assume took hours when they actually take like twenty minutes of actual work.
My mother-in-law saw them at a family gathering last Thanksgiving and literally asked if I’d ordered them from a bakery. Best compliment ever? Maybe. But also slightly insulting because I’d been up at 6 AM making them. Whatever, I’ll take it.
Here’s the thing though—the first time I made these, they were a complete mess. Like, pumpkin filling oozing out everywhere, the twists unraveling in the oven, and the whole situation looking like a Pinterest fail waiting to happen.
But now? I’ve got the technique down, and these pumpkin pie twists are probably the easiest impressive dessert I make. Which is saying something because I’m usually a disaster in the kitchen.
Table of Contents
How I Discovered Flaky Pumpkin Pie Twists
I think I first saw something similar on Instagram… or maybe it was TikTok? Honestly can’t remember because I look at way too much food content when I should be doing literally anything else productive.
What I do remember is thinking, “That looks doable,” which is usually my first mistake when it comes to trying new recipes. But surprisingly, this time it actually was doable once I figured out a few tricks.
My first attempt was during a random October weekend when I was feeling ambitious and wanted to make something festive. I had puff pastry in the freezer (because I always have puff pastry in the freezer—it’s basically my secret weapon for looking like I know what I’m doing), and I thought, why not try these twist things?
Version 1.0 was… rough. I used too much filling, twisted them too tight, and they basically exploded in the oven. My husband walked into the kitchen, looked at the pan, and wisely decided not to comment. Smart man.
Version 2.0 was better but the twists were all different sizes and looked kind of sloppy. They tasted good though, so I kept at it.
Now I’m on like version 8.0, and these pumpkin pie twists actually look bakery-quality. Most of the time. When I’m paying attention.
What Makes These Pumpkin Pie Twists So Good
Look, I’m not gonna pretend this is some revolutionary recipe. It’s puff pastry with pumpkin pie filling twisted up and baked. But the magic is in the simplicity, you know?
The puff pastry gets all golden and flaky, the pumpkin filling has that perfect spiced sweetness, and they’re just the right size for a fall dessert that doesn’t make you feel like you need to unbutton your pants afterward.
Plus, they’re one of those recipes where you can prep them ahead, freeze them, and bake them whenever you need to look like you have your life together. Which for me is… often.
My neighbor Sarah makes these for her kids’ school events, and she says teachers literally fight over them. I choose to believe this is true because it makes me feel better about the amount of butter involved.
Shopping for Your Pastry Adventure
Alright, here’s what you need, and I promise it’s a short list:
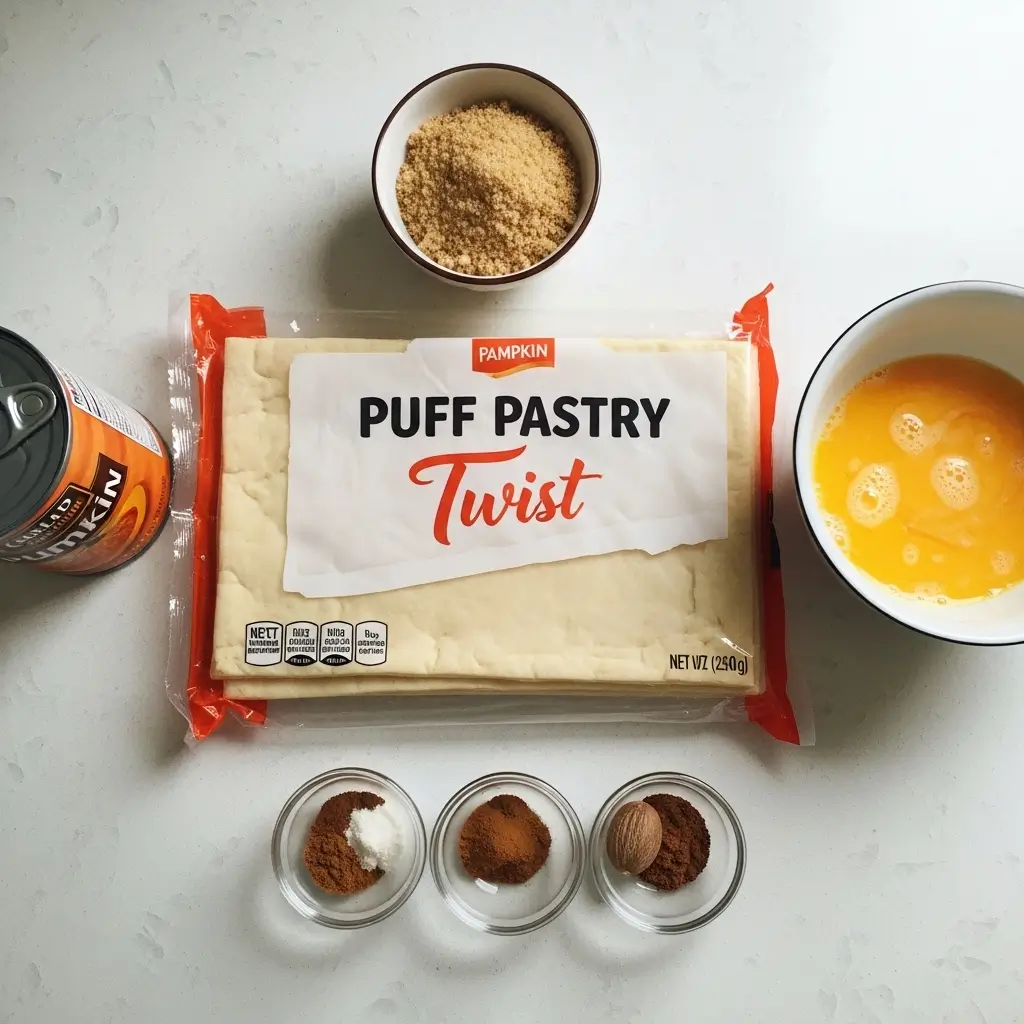
The Essentials:
- 2 sheets puff pastry, thawed (I use Pepperidge Farm—always keep it in the freezer)
- 1 cup canned pumpkin puree (NOT pumpkin pie filling—this is important)
- 1/4 cup brown sugar
- 1 teaspoon pumpkin pie spice (or make your own with cinnamon, nutmeg, ginger, and cloves)
- 1/4 teaspoon cinnamon
- Pinch of salt
- 1 egg, beaten (for egg wash)
- 2 tablespoons granulated sugar mixed with 1/2 teaspoon cinnamon (for topping)
Optional but Delicious:
- Cream cheese frosting for drizzling
- Caramel sauce for serving
- Vanilla ice cream (because why not?)
Now, about that puff pastry—make sure it’s thawed properly. Like, leave it in the fridge overnight or on the counter for 30-40 minutes. If it’s too frozen, it’ll crack when you try to work with it. If it’s too warm, it’ll be sticky and impossible to handle. There’s a sweet spot, and you’ll know it when you find it.
And seriously, don’t buy pumpkin pie filling thinking you can use it instead of plain pumpkin. I did this once when I was in a hurry at the grocery store, and the twists came out way too sweet and weirdly spiced. Plain pumpkin puree only.
Making Perfect Flaky Pumpkin Pie Twists
Here’s where I learned everything the hard way so you don’t have to:
Step 1: Prep Your Filling Mix together the pumpkin puree, brown sugar, pumpkin pie spice, cinnamon, and salt in a bowl. It should be thick, not runny. If it looks too liquidy, your twists will be soggy disasters.
Taste it—it should taste like pumpkin pie but slightly less sweet since you’re adding cinnamon sugar on top later.
Step 2: Prep Your Pastry The key is—oh wait, I forgot to mention—preheat your oven to 400°F and line a baking sheet with parchment paper. Do this first or you’ll be standing there with assembled twists wondering where to put them like I did the first time.
Unfold your puff pastry sheets on a lightly floured surface. They should be cold but pliable. If they’re starting to feel warm and sticky, pop them in the fridge for 10 minutes.
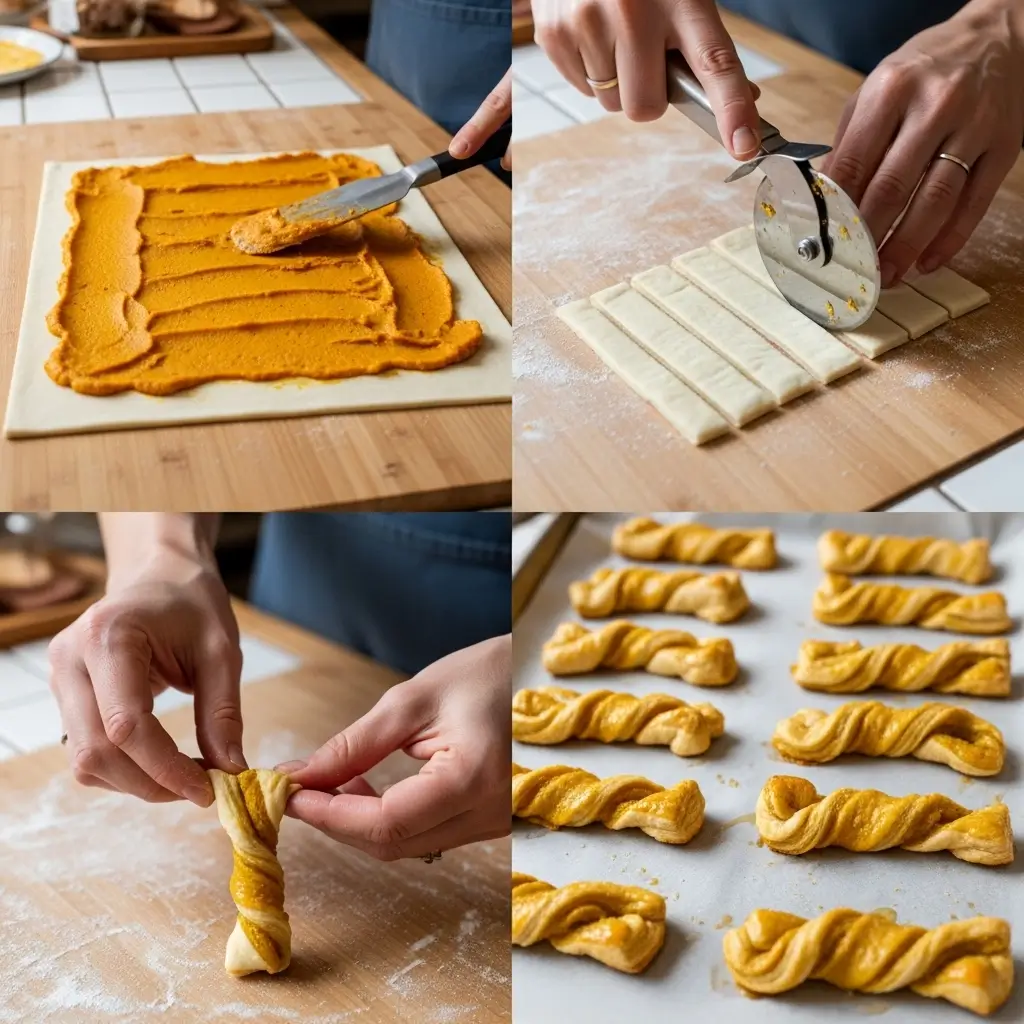
Step 3: The Assembly (This Is Where It Gets Fun) Spread a thin layer of the pumpkin mixture over one sheet of puff pastry. And I mean THIN. Like, maybe 2-3 tablespoons max. The first time I made these, I used way too much filling and they turned into a hot mess.
Place the second sheet of puff pastry on top and press down gently to seal them together.
Step 4: Cut and Twist Using a sharp knife or pizza cutter (pizza cutter works better, trust me), cut the pastry into strips about 1 inch wide. You should get about 10-12 strips.
Now here’s the technique that took me forever to figure out: hold each strip at both ends and twist it gently—like, 3-4 times max. Don’t twist it super tight or it’ll unravel while baking. Don’t barely twist it or it won’t look like anything.
Place each twisted strip on your prepared baking sheet, pressing down the ends so they don’t untwist during baking. This is crucial. Do NOT skip pressing down the ends.
Step 5: The Finishing Touches Brush each twist with beaten egg. This gives them that gorgeous golden color. Then sprinkle generously with the cinnamon sugar mixture.
Step 6: Bake Bake for 15-18 minutes until they’re puffed up and golden brown. Don’t walk away from the oven. Seriously. These can go from perfect to burned in like two minutes.
Set a timer because I always think I’ll remember, and I never do. Last week I got distracted helping my daughter find her soccer cleats, and by the time I remembered the twists, they were definitely more golden than intended.

My Epic Failures (Learn From Me)
Let me tell you about the time I tried to make these for a potluck at work. I was feeling super confident because I’d made them successfully at home like three times.
First mistake: I made them the night before and tried to reheat them. They lost all their flakiness and became kind of sad and chewy.
Second mistake: I transported them stacked on top of each other in a container. They all stuck together and broke apart when I tried to separate them.
Third mistake: I forgot to press down the ends, and half of them completely unraveled in the oven. Had to pretend they were supposed to look like that.
Another time, I was making these while my kids were fighting over something in the living room, and I accidentally twisted some of them the wrong direction—like, I was holding them weird because I was distracted—and they came out looking totally wonky. Still tasted good though.
Oh, and there was the time I used puff pastry that had been in my freezer for like a year. Turns out freezer-burned puff pastry doesn’t puff. It just kind of… sits there. Flat and sad.
Tips for Bakery-Style Pumpkin Pie Twists
About the Puff Pastry: Cold is your friend. If the pastry starts getting too warm while you’re working with it, stick it back in the fridge. Warm puff pastry is a nightmare to work with.
Filling Ratio: Less is more. I cannot stress this enough. You want just enough filling to taste it, but not so much that it oozes out everywhere. Think thin layer, not thick.
Even Twisting: Try to twist all your strips the same number of times in the same direction. They’ll look more uniform and professional. Not that mine always do, but you know, goals.
The Egg Wash: Don’t skip this. It’s what makes them look golden and gorgeous. If you forget, they’ll still taste good but they’ll be pale and sad-looking.
Serving Fresh: These are best eaten the day you make them, preferably while still slightly warm. They lose their flakiness if you store them too long. You can reheat them in the oven at 350°F for a few minutes, but they’re never quite as good as fresh.
Make-Ahead Trick: You can assemble these, put them on a baking sheet, and freeze them. Then bake from frozen, adding a few extra minutes to the baking time. This has saved me so many times when unexpected guests show up.
Variations I’ve Tried
Once you get the basic flaky pumpkin pie twists down, you can experiment:
- Added mini chocolate chips to the filling (my kids’ favorite)
- Drizzled with cream cheese frosting after baking (so good)
- Sprinkled with chopped pecans before baking
- Used apple butter instead of pumpkin for apple pie twists
- Added a pinch of cardamom to the filling for a different flavor
My sister likes to serve hers with vanilla ice cream and caramel sauce, which is basically dessert overkill but also delicious.
Why These Became My Go-To Fall Dessert
There’s something really satisfying about making something that looks impressive but is actually super simple. Most people assume these pumpkin pie twists are complicated, and I just smile and nod while internally thinking, “I literally threw puff pastry and canned pumpkin together.”
They’re perfect for fall gatherings, Thanksgiving dessert tables, or just random Tuesday afternoons when you want something sweet with your coffee but don’t want to commit to making a whole pie.
The smell while they’re baking is incredible too. Like, autumn in pastry form. My whole house smells like cinnamon and pumpkin, and it’s basically better than any candle I’ve ever bought.
Plus, they’re way easier than actual pumpkin pie, and nobody has to know that. Let them think you slaved away in the kitchen all day.
Final Thoughts
If you try these flaky pumpkin pie twists, let me know how they turn out! Seriously, I’m always curious about whether my recipes work in other people’s kitchens or if I’m just lucky.
And if they don’t turn out perfect the first time, don’t give up. Mine definitely didn’t, and now they’re one of the things I make most often during fall.
The key is really just keeping the puff pastry cold, using a thin layer of filling, and pressing down those ends. Get those three things right and you’re golden.
Now I’m totally craving one of these with my afternoon coffee. Maybe I’ll make a batch this weekend.
Happy baking, and may your twists stay twisted! 🥐